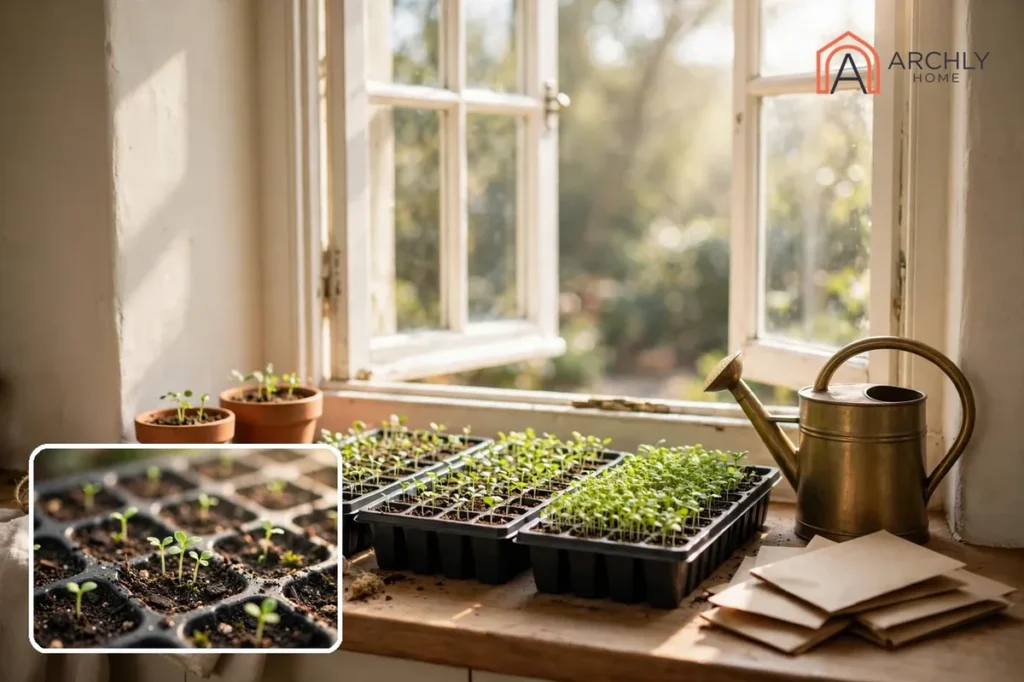
Starting seeds indoors means giving your plants a head start while the ground outside is still too cold to sow. You sow in containers on a windowsill or under a light, raise the seedlings for a few weeks, harden them off gradually, and move them into the garden after the last frost. Done right, it buys you weeks of growing season, costs far less than buying transplants, and opens up varieties no nursery stocks. Done wrong, it produces tall, pale, floppy seedlings that never recover. The difference is almost always light and water — too little of the first, too much of the second. This guide covers the timing, the setup, the daily routine, and the fixes for the problems that actually show up.
This is the indoor stage only. Once your seedlings are ready for the garden, our guide to how to start a vegetable garden covers planning the beds and planting out.
Why Start Seeds Indoors
There are three real reasons to start seeds inside. First, time: tomatoes, peppers and eggplant need a long warm season, and in many climates they simply will not mature if you wait until the soil is warm enough to sow outside. A six-to-eight-week head start solves that. Second, choice: a seed packet costs about what one nursery seedling does, and it opens up varieties — heirlooms, unusual colours, specific flavours — that no garden centre carries. Third, control: you decide the timing, the soil and the conditions, instead of hoping the nursery has what you want on the week you need it.
It is not worth starting everything indoors. Some crops hate transplanting and do better sown where they will grow, and starting them inside is extra work for a worse result. The next section sorts out which is which.
Which Seeds Belong Indoors And Which Do Not
Start indoors the crops that need a long season or are slow to get going: tomatoes, peppers, eggplant, onions, leeks, celery, parsley, and slow flowers such as lavender and many perennials. Brassicas — broccoli, cabbage, kale and cauliflower — also benefit, because the head start lets them mature before summer heat stresses them. Lettuce and other leafy greens can go either way, but a short indoor start gives you earlier salads.
Sow these directly in the garden instead: root crops such as carrots, beets, radishes and turnips, whose roots dislike disturbance; peas, beans and corn, which germinate fast in warming soil and resent transplanting; and cilantro and dill, which bolt quickly when moved. Cucumbers, squash and melons sit in the middle — they can be started indoors, but only for three to four weeks and ideally in peat or fibre pots, because they transplant poorly and catch up quickly when sown directly. If you are unsure about a crop, the seed packet is the authority: it tells you whether to start indoors or sow directly, and how many weeks before the last frost.
| Start Indoors | Sow Directly Outdoors |
|---|---|
| Tomatoes, peppers, eggplant | Carrots, beets, radishes, turnips |
| Onions, leeks, celery, parsley | Peas, beans, corn |
| Broccoli, cabbage, kale, cauliflower | Cilantro, dill |
| Lavender and slow perennial flowers | Cucumbers, squash, melons (or a short 3–4 week indoor start in fibre pots) |
| Lettuce and leafy greens (optional early start) | Sunflowers, zinnias, nasturtiums (also fine indoors, but direct sowing works well) |
When To Start Seeds Indoors
Timing is the part most beginners get wrong, and the rule is simple: count backwards from your average last spring frost date. Your state extension service publishes frost dates for your area, and the seed packet tells you how many weeks that crop needs indoors. Start too early and you get leggy, root-bound plants with nowhere to go; start too late and you lose the head start.
| Crop | Weeks Indoors Before Last Frost | Set Out |
|---|---|---|
| Onions, leeks | 10–12 weeks | 4 weeks before last frost |
| Celery | 10–12 weeks | After last frost |
| Peppers, eggplant | 8–10 weeks | 2 weeks after last frost |
| Tomatoes | 6–8 weeks | 1–2 weeks after last frost |
| Broccoli, cabbage, kale | 4–6 weeks | 2–4 weeks before last frost |
| Lettuce and leafy greens | 4–5 weeks | 3–4 weeks before last frost |
| Cucumbers, squash, melons | 3–4 weeks | 1–2 weeks after last frost |
Work an example: if your last frost falls in early May, tomatoes sown six to eight weeks earlier go in during March, and peppers sown eight to ten weeks earlier go in during late February or early March. Frost dates run weeks apart across the country, so the calendar date shifts with your region even though the count-back rule does not. Write the sowing date and the variety on a label the day you sow — seedlings of different varieties look identical, and you will not remember which is which in three weeks.
Tip: Resist the urge to sow everything on the same day. Stagger by crop, following the table above, and each tray will be the right size on the day it moves outside.
What You Need To Start Seeds Indoors
You do not need a greenhouse or an expensive kit. A sunny window, a few trays and a little patience will do it — though a simple grow light is the one purchase that changes results the most, as the light section explains.
- Fresh seeds — germination falls off as packets age, so use this year’s seed for the crops that matter
- Containers at least 2 inches deep with drainage holes: cell trays, small nursery pots, or recycled yogurt cups and takeout containers with holes punched in the bottom
- A solid tray without holes underneath, to catch drips and for bottom watering
- Fresh, sterile seed-starting mix — fine, light and low in nutrients, not garden soil and not regular potting mix
- A clear dome, lid or plastic bag to hold humidity until germination
- Labels and a permanent marker
- A spray bottle or mister
- A fluorescent shop light or LED grow light you can raise on chains, plus an outlet timer
- Optional: a seedling heat mat for warm-season crops such as peppers, which germinate poorly in cool rooms

Seed-starting mix deserves a word of its own. Garden soil is far too dense for a shallow container and can carry weed seeds, insects and disease indoors. Regular potting mix is better but still heavier and richer than seedlings need at the start. A soilless seed-starting mix — usually peat moss or coir with perlite and vermiculite — is light, drains well, and is generally free of weeds and pathogens when fresh. It carries almost no nutrition, which is fine: a seed contains everything it needs to sprout, and feeding starts later, after the first true leaves appear.
How To Start Seeds Indoors Step By Step
Work through these steps in order. The order matters — dry mix repels water, unsown seed dries out, and an unlabelled tray is a mystery in a fortnight.
1. Read the packet first. It carries the depth, spacing and any special needs for that exact variety. Some seeds need light to germinate and should sit on the surface, not buried. 2. Moisten the mix before you sow. Tip it into a bowl or bucket and add water until it is damp like a wrung-out sponge. Dry seed-starting mix repels water and leaves dry pockets that kill germination. 3. Fill the containers and firm lightly. Fill to within an inch of the top, level the surface, and press gently — firm, not compacted. 4. Sow at the depth the packet specifies. As a general rule, plant most seeds about twice as deep as they are wide, so a seed an eighth of an inch across goes a quarter of an inch deep. Small seeds such as lettuce can sit on the surface, uncovered or very lightly covered. 5. Sow two or three seeds per cell. Germination is never complete, and the extras give you insurance. You will thin to the strongest later. 6. Label immediately. Variety and sowing date, on every tray, with a permanent marker. 7. Cover loosely. Set a clear dome or plastic over the tray to hold humidity, keeping the plastic off the mix. 8. Provide warmth. Most vegetable seeds germinate well at ordinary room temperature, with the mix at 65 to 75 degrees Fahrenheit. A heat mat warms the mix to about 70 degrees and helps peppers and eggplant; take the tray off the mat once about half the seeds have sprouted. 9. Remove the cover as soon as seedlings emerge. Leaving it on creates the still, humid conditions that cause damping off. Move the tray under the lights the same day.

Light: The Part That Decides Success
Light is where most first attempts fail. A sunny south window looks bright to us, but it delivers far less light than a spring day outdoors, and seedlings respond by stretching: long, pale, floppy stems reaching for the glass, with small leaves. Those seedlings rarely recover into strong plants.
A simple LED shop light or grow light is the single most effective purchase in seed starting. Hang it on chains so you can raise it as the seedlings grow, and keep it just a few inches above the leaves — 2 to 6 inches for most LED fixtures, 2 to 4 inches for fluorescent tubes. Run it 14 to 16 hours a day on a timer, then give the plants darkness at night; they need the dark period to develop properly. Raise the light as the plants grow so the tops stay close to it.
If a window is all you have, use the brightest south-facing one, rotate the tray daily so the seedlings do not lean, and accept stretchier plants — cool-season crops such as lettuce and brassicas cope better with window light than tomatoes do. A small fan on low for a few hours a day also helps: the gentle air movement produces sturdier stems and reduces fungal problems. Whichever light you use, watch the stems. The moment they start to stretch, lower the light.
Watering Without Rotting Your Seedlings
Overwatering is the most frequent mistake in seed starting. Roots stop growing and die when the mix is saturated, because the water displaces the oxygen — and in mix kept too wet, the fungi that cause damping off can kill a whole container of seedlings overnight. Underwatering kills too, but it is the rarer error.
Water when the top of the mix is nearly dry, and let the excess drain away. Bottom watering is the safest method: set the cells in a tray with about half an inch of water for twenty minutes, then drain whatever remains. It keeps the surface drier, encourages roots downward, and never dislodges a seed. If you water from above, use a fine stream at the base of the stems or a gentle mist, never a heavy pour. Check the trays at least once a day, and let the surface dry slightly between waterings once the seedlings are up. Small flies over the tray and green algae on the surface are both signs the mix is staying too wet.
Tip: A pencil slipped under one corner of the humidity dome, or a small fan nearby, keeps air moving over the trays. Stagnant, humid air is exactly what damping off needs.

Thinning And Potting On
Once seedlings have their first true leaves — the second set, which look like the adult plant rather than the first rounded seed leaves — thin to one seedling per cell. Snip the extras off at soil level with scissors. Pulling them disturbs the roots of the one you are keeping.
When the roots fill the cell and the plant has several sets of leaves, move it into a larger pot with regular potting mix. Water the seedling well an hour or two before the move, lift it with a butter knife or chopstick, and handle it by a leaf, never by the stem — a crushed stem is fatal, a damaged leaf is not. Set it at the same depth it was growing, firm the mix gently around it, and water it in. Tomatoes are the exception: they root along a buried stem, so you can plant them deeper, up to the first set of leaves.
Feeding starts at this stage, because seed-starting mix carries almost no nutrition. Once the seedlings have several sets of true leaves, feed with a water-soluble fertilizer at quarter strength once a week, or at the label rate for indoor plants and transplants. Crops that spend six weeks or less indoors may never need feeding at all. Rinse off any liquid fertilizer that lands on the leaves.
Hardening Off: Moving Seedlings Outside
Indoor seedlings have thin leaves with little protection against sun and wind. Moving them straight outside can scorch or shred them within a day, so harden them off over seven to fourteen days. Start with an hour or two in full shade outdoors on a mild day, then bring them in. Increase the outdoor time gradually, adding morning sun after a few days, and work up to a full day in conditions similar to their final spot. Keep them well watered during this period — outdoors they dry out far faster than they did on the windowsill. Bring them in if frost or a storm is forecast.
Transplant on a calm, overcast day or in the late afternoon, never under a hot midday sun. Water the seedling an hour or two before the move so the root ball holds together, dig a hole slightly wider than the root ball and the same depth, set the plant in, backfill lightly, and water thoroughly right away — that first watering settles the soil against the roots and matters more than any other step. Mulch around the plant, keeping the mulch an inch clear of the stem. Expect a pause: a little wilting in the first day or two, and no visible growth for a week, is normal. Growth resumes once the roots extend into the surrounding soil. If you are planting into beds you built yourself, our guide to how to build a raised garden bed covers the bed preparation before transplant day.

Common Seed Starting Problems And Fixes
| What You See | Likely Cause | What To Change |
|---|---|---|
| Tall, thin stems leaning toward the light | Too little light | Lower the lights to 2–6 inches above the plants and run them 14–16 hours a day |
| Seedling collapses at soil level, stem pinched and water-soaked | Damping off from mix kept too wet | Throw out the affected plants and mix, clean the containers, water less, and remove humidity covers once seedlings emerge |
| Small flies hovering over the tray | Fungus gnats thriving in moist mix | Let the surface dry between waterings and improve air movement |
| Seedlings yellow and stall after true leaves appear | No nutrition left in the seed-starting mix | Pot on into potting mix and start a quarter-strength feed once a week |
| Seeds never sprout | Mix too cold, too dry, or sown too deep | Check the packet depth, keep the mix at 65–75°F, and keep it evenly damp |
| Seedlings wilt the day after transplanting | Transplant shock | Water well, shade for the first few afternoons, and wait — a little wilting for a day or two is normal |
After a damping-off infection, wash the containers and tools to remove debris and soak them briefly in a diluted bleach solution mixed to the label strength, then rinse with clean water. Do not reuse the infected mix.
Frequently Asked Questions
When Should I Start Seeds Indoors?
Count back from your average last spring frost using the weeks-indoors figure on the seed packet. Tomatoes need six to eight weeks, peppers and eggplant eight to ten, and onions and leeks ten to twelve. Start too early and the seedlings get leggy and root-bound before they can go out; start too late and you lose the head start.
How Much Light Do Seedlings Need Indoors?
Fourteen to sixteen hours a day, with the light just a few inches above the leaves. A south-facing window is the minimum, and a simple LED or fluorescent shop light hung close above the trays gives far stronger, stockier plants. Rotate window trays daily so the seedlings grow evenly instead of leaning toward the glass.
What Soil Should I Use To Start Seeds?
A commercial seed-starting mix — light, sterile, and free of weed seeds. It gives delicate roots the loose, well-drained medium they need. Avoid garden soil, which is heavy and can carry weed seeds, insects and disease, and hold off on regular potting mix until you pot the seedlings on. For more on growing tomatoes from your transplants, see our guide to how to grow tomatoes in containers.
How Deep Should I Plant Seeds?
As a general rule, about twice as deep as the seed is wide. Read the packet for the exact depth, because some seeds need light to germinate and should sit at or near the surface rather than buried. Sowing too deep is a common reason seeds never sprout — the seedling exhausts its reserves before reaching the light.
What Does Hardening Off Mean?
It is the gradual process of getting indoor seedlings used to outdoor conditions — sun, wind and cooler nights. Over seven to fourteen days before transplanting, set the plants outside in a sheltered, shady spot for an hour or two the first day, then add time and sun a little each day until they can spend a full day outside. Skipping it is one of the most common reasons carefully raised seedlings fail in their first week outdoors.
Final Word
Starting seeds indoors is a small weekly routine, not a big project: check the water, check the light height, give them a little air, and label everything. The two rules that carry the whole job are to give seedlings far more light than feels necessary and far less water than feels kind. Get those two right, sow at the right time for each crop, and harden the plants off before they move out, and the garden starts weeks earlier with plants you raised yourself. If a tray fails, it costs a packet of seed and a few weeks — sow again, fix the light or the water, and try once more.
For a second opinion from a university source, the University of Minnesota Extension keeps a plain-English guide to the same process: Starting Seeds Indoors.