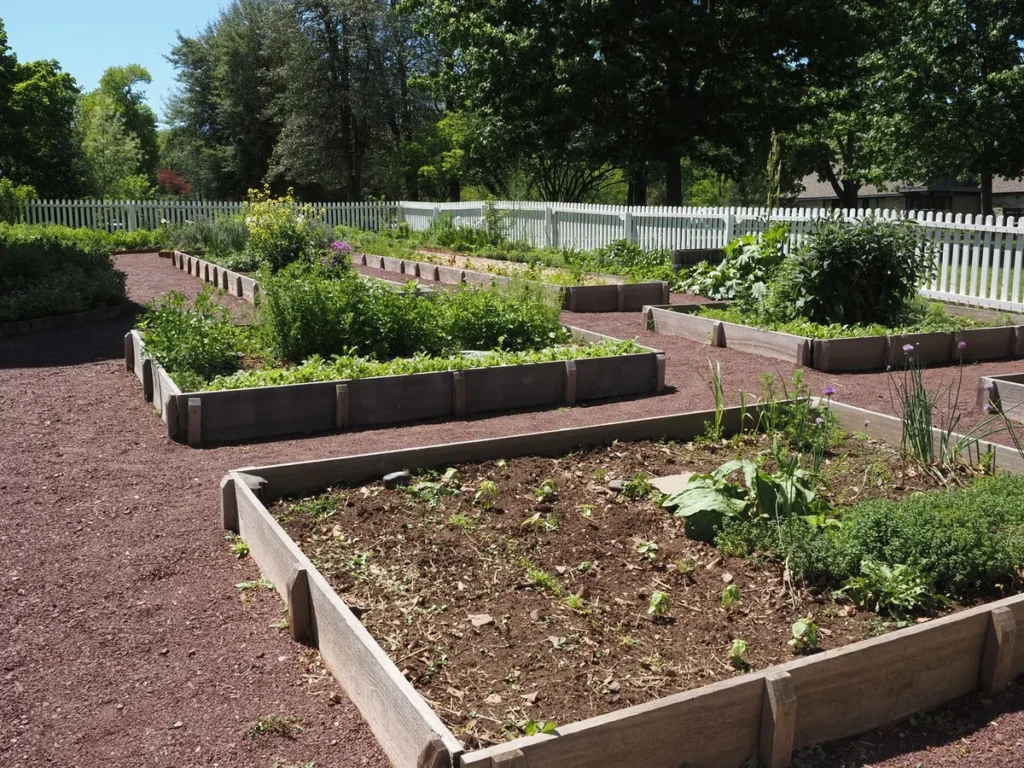
A cedar garden bed is the closest thing to a “build it once” choice in vegetable gardening. It looks beautiful on day one, shrugs off soil moisture for years without chemical treatment, and grows tomatoes as well as any bed. If you’ve watched a cheap pine bed’s corners crumble by the third season, you already understand the argument for cedar.
This guide covers why cedar beats other woods, the sizes that work, step-by-step cedar garden bed plans, how to fill the bed, what to plant, and how to keep it going for a decade or more.
Quick Answer
- Why cedar: It contains natural compounds (thujaplicins) that resist rot and insects, so a cedar raised garden bed lasts far longer than untreated pine — with zero chemical preservative, which makes it ideal for growing food.
- Best size: A 4×8 ft bed, 11–12 inches deep (two stacked 2×6 boards), is the workhorse. Keep width to 4 ft or less so you can reach the middle from either side.
- How long do cedar garden beds last: Typically 10–15 years, sometimes longer with good drainage. The bottom course in constant contact with damp soil wears first; boards above the soil line stay solid much longer.
- DIY or kit: A DIY build from cedar boards and corner brackets usually costs less per square foot than a kit and takes an afternoon with basic tools.
Why Is Cedar The Best Wood For Raised Garden Beds?
Cedar’s reputation is chemistry, not marketing. Western red cedar heartwood contains natural extractives that are toxic to decay fungi and unappealing to termites. Pine has essentially none of this protection — which is why an untreated pine bed rots within a few seasons while a cedar bed in the same yard barely changes.
That gives you two practical wins. First, no chemical treatment is needed. Untreated cedar removes the question entirely — nothing was applied, so nothing can leach into your tomatoes. Second, cedar ages gracefully, weathering from warm reddish-brown to a soft silver-gray over a couple of years.
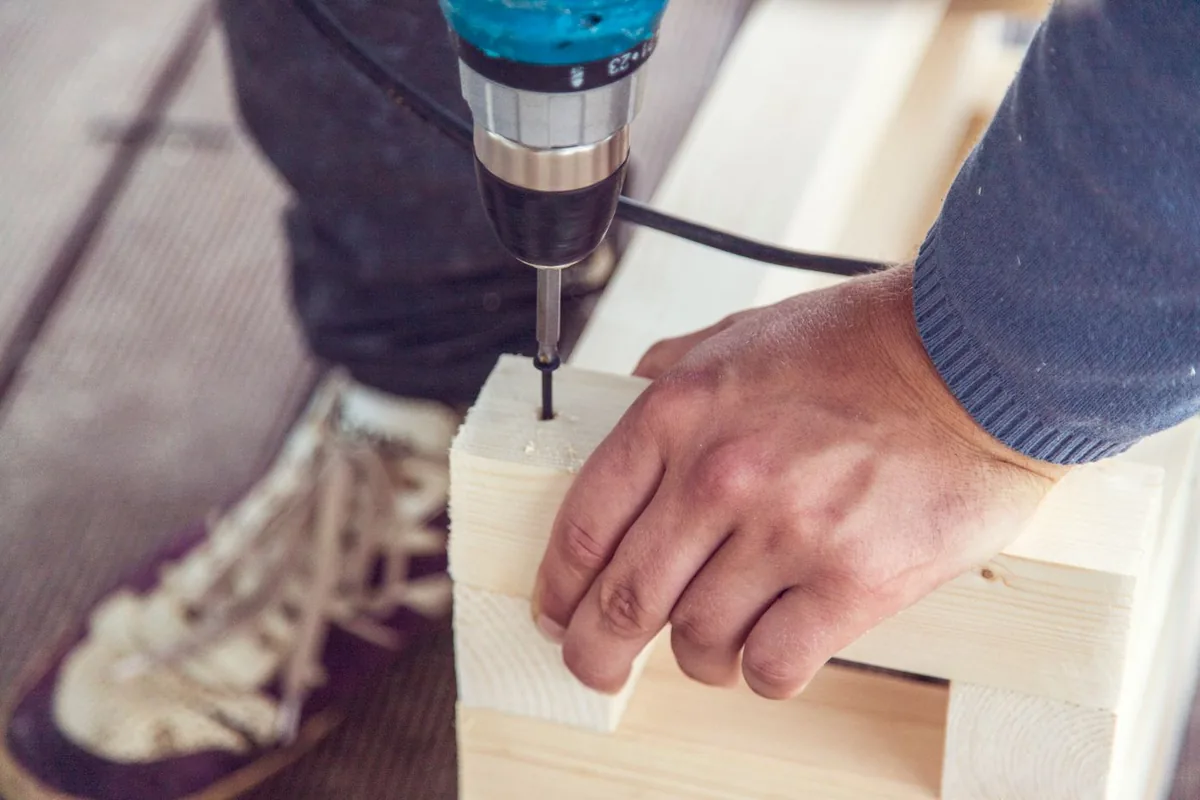
Cedar is also forgiving to build with: light, cuts cleanly, takes screws well. Just pre-drill near board ends — Western red cedar can split if you drive a screw close to the edge without a pilot hole. Eastern red cedar is denser and even more rot-resistant, but it’s harder to find in wide lumber-yard dimensions.
What Types Of Cedar Garden Beds Can You Buy Or Build?
There are three paths to a cedar raised garden bed.
Kits. Pre-cut boards, corner connectors, and hardware in one box; most assemble in under an hour with a screwdriver. Ideal if you don’t own a saw — but you pay more per board foot and get fixed sizes, usually 4×4 ft or 4×8 ft.
DIY boards + corner brackets. The sweet spot for most people. Buy cedar 2×6 or 2×8 boards, add metal corner brackets (or cedar 4×4 posts), and screw it together. Custom dimensions, replaceable boards, usually cheaper than a kit.
Full DIY from raw lumber. Cheapest if you own a circular saw and a drill, and the only route to odd sizes — L-shapes, narrow side-yard beds, terraces on a slope. It’s also how you build taller beds: three stacked 2×6 boards gives roughly 16–17 inches of depth, great for root vegetables or less bending.
Whatever route you take, check what you’re buying. True Western red cedar is the common, reliable lumber-yard choice. Some kits labeled “cedar” use thin ¾-inch boards that flex under soil pressure — 1.5-inch nominal boards (the actual thickness of a “2×” board) are sturdier on 8-ft spans.
What Size And Depth Should A Cedar Raised Garden Bed Be?
Two rules keep you out of trouble. Width: 4 feet or less for a bed you access from both sides (3 ft against a fence), so you can reach the middle without stepping in. Length: up to 8 feet — beyond that, long boards flex. Need more space? Build two beds with a path between them.
Depth is where beginners most often undershoot. Six inches sounds fine, but once the soil settles it’s really about four — shallow for most root systems:
| Bed depth | Best for | Notes |
|---|---|---|
| 6 inches | Herbs, lettuce, shallow greens | Dries out fastest; needs frequent watering |
| 11–12 inches (two 2×6 boards) | Tomatoes, peppers, beans, most vegetables | The most versatile, best-value depth |
| 16–18 inches (three boards) | Carrots, potatoes, parsnips; less bending | Costs more to fill; great on slopes or poor native soil |
If you’re filling over a solid surface like a patio, add a few inches — plants can’t reach native soil below, so the bed carries the full root zone. For the construction side of raised beds in general, our guide on how to build a raised garden bed walks through siting, leveling, and the first build step by step.
How To Build A Cedar Raised Garden Bed: Step-by-Step Plans
Here are straightforward cedar garden bed plans for the classic 4×8 ft, 12-inch-deep bed — big enough for a real harvest, small enough to finish in a day.
Materials: four cedar 2×6s at 8 ft, four at 4 ft (two courses); four 12-in 4×4 cedar corner posts or metal corner brackets; exterior-rated 2½–3 in coated screws; drill, tape measure, level, saw if cutting yourself.
The build:
1. Pick the spot and prep it. Six or more hours of sun, near a water source, roughly level. Scalp the grass and lay cardboard or landscape fabric to smother weeds underneath.
2. Assemble the first course. Lay the boards in a rectangle and fasten the corners — two screws per joint into the posts, or per the bracket maker’s instructions.
3. Set and level it. Check level along both long sides and shim with flat stones or packed soil. A leaning bed looks sloppy and drains unevenly.
4. Stack the second course, staggering the corner joints so the top course’s seams land mid-board on the course below. Screw the courses together at the corners and every couple of feet along the sides.
5. Brace long spans. On beds over ~6 ft, screw a short interior board across the middle (below the rim) to keep walls from bowing once the bed is full of wet soil. Ten minutes now saves years of irritation.
6. Square it up. Measure corner to corner diagonally — equal diagonals mean square. Adjust before you fill, because a full bed doesn’t move.
What Soil Should Go Into A Cedar Garden Bed?
A cedar bed is only as good as its filling. Layer it: coarse twigs and small branches in the bottom 4–6 inches for cheap bulk and drainage; a middle layer of finished compost, shredded leaves, or well-rotted manure; and a top 6 inches of growing mix — roughly 60% topsoil, 30% compost, 10% aeration like perlite or coarse sand. You want it dark, crumbly, and smelling like a forest floor.
A 4×8×1 ft bed holds about 32 cubic feet — a lot of bagged soil, so bulk delivery usually works out better. Expect settling: fill to the brim, water well, and top up with compost before planting.
One mistake to avoid: lining the inside walls with plastic. It traps moisture against the boards — exactly what shortens their life. Line only the bottom with cardboard or landscape fabric to block weeds while water drains through.
What Should You Plant In A Cedar Raised Garden Bed?
Cedar beds grow everything other raised beds grow, but a few crops play to their strengths: tomatoes and peppers love the warm, loose 12-inch soil (one indeterminate tomato per 2×2 ft section); carrots, beets, and radishes thrive in the stone-free mix; leafy greens and herbs suit shallower builds. Keep mint in its own pot unless you want it colonizing the whole bed, and rotate crops year to year — not planting tomatoes in the same spot two seasons running is the simplest, cheapest disease prevention there is.
For more beginner-friendly growing guides, browse the gardening section.
How Long Do Cedar Garden Beds Last, And How Do You Maintain Them?
How long do cedar garden beds last? In most climates, roughly 10–15 years, sometimes more in dry climates with good drainage. The boards in constant contact with damp soil at the bottom course almost always fail first, while the above-soil portions can look nearly new for years.
University of Georgia Extension’s guidance on raised bed materials notes cedar’s natural rot and insect resistance — though, like any wood in direct soil contact, its exact lifespan varies with conditions, which is why good design matters (source).
Maintenance is refreshingly light, but a little attention each year adds seasons:
- Top up the soil each spring with compost — settling pulls the surface away from the top boards.
- Keep water from ponding against the bed; regrade around it or dig a shallow trench if it does. Standing water is the biggest lifespan killer.
- Don’t line the side walls with plastic — it traps moisture against the wood. Let the bed breathe.
- Consider a food-safe oil on the outside faces every couple of years (raw linseed oil, not “boiled,” which contains solvents). It’s cosmetic — it slows the gray weathering — and keep it off the soil.
- Replace single boards rather than whole beds. With bracket-and-board construction, unscrewing one soft bottom-course board and slotting in fresh cedar buys another decade. That’s the real economy of cedar.
Cedar Vs. Other Raised Bed Woods: How Do They Compare?
| Material | Rot resistance | Typical lifespan | Treatment needed? | Notes |
|---|---|---|---|---|
| Western red cedar | High | ~10–15 years | No | Light, easy to work, weathers to silver-gray |
| Eastern red cedar | Very high | ~15+ years | No | Denser, harder to work; less common in wide boards |
| Redwood | High | ~10–20 years | No | Excellent, but pricier and regionally limited |
| Douglas fir | Moderate | ~5–8 years | No | Budget-friendly; use thick boards, good drainage |
| Untreated pine | Low | ~2–5 years | No | Cheapest upfront; expect frequent rebuilds |
| Pressure-treated pine | Moderate–high | ~8–12 years | Yes (copper-based) | Not allowed in organic production |
The honest summary: if you’re growing food and want to build once, cedar or redwood are the woods worth paying for. Douglas fir is a reasonable compromise on a tight budget, and untreated pine is fine for a “test bed” you’re not attached to. Pressure-treated lumber is its own category — acceptable to many gardeners with modern formulations, but off the table for organic growers.
Frequently Asked Questions
Is A Cedar Garden Bed Safe For Growing Vegetables?
Yes. Cedar is one of the safest choices for food gardening because its rot resistance comes from naturally occurring compounds in the wood, not applied chemicals. No preservative is needed, and cedar is fully compatible with organic growing standards — which is more than can be said for pressure-treated lumber.
How Long Do Cedar Garden Beds Last?
Typically 10–15 years, sometimes longer in drier climates with good drainage. The bottom course in direct soil contact shows wear first, while boards above the soil line can remain solid for many more years.
Should I Line My Cedar Raised Bed?
Line the bottom only — cardboard or landscape fabric suppresses weeds while letting water drain. Don’t line the inside walls with plastic: it traps moisture against the wood and shortens the bed’s life. Cedar’s natural rot resistance means the walls need no lining at all.
Does Cedar Garden Bed Wood Need To Be Sealed Or Stained?
Not for structural life — sealing doesn’t meaningfully protect wood in direct contact with damp soil. Raw linseed oil on the outside faces slows weathering and keeps the warm cedar color longer, but that’s cosmetic, not a requirement. Skip anything containing solvents or biocides on a food-growing bed.
Are Cedar Raised Bed Kits Worth It, Or Should I Build My Own?
Kits are worth it if you value speed: pre-cut boards and connectors assemble in under an hour. Building your own from lumber-yard cedar and corner brackets usually costs less per square foot, gives custom dimensions, and makes board replacement easy.
A Bed Worth Building Once
A cedar garden bed is one of those rare purchases where the more expensive option is also the cheaper one over time. You pay more than pine on day one; in return you get a bed that needs no chemical treatment, looks good for a decade-plus, grows great vegetables, and — when the time eventually comes — asks only for a replacement board instead of a full rebuild. Build it square, fill it generously, keep the drainage honest, and it’ll quietly do its job while you focus on the growing.