

Yes, you can hang wallpaper yourself, and the first strip is the only genuinely hard part.
Once it is up straight, the rest of the job is mostly measuring, cutting, pasting and smoothing — and the result changes a room much faster than paint ever will. This guide takes you through it step by step: how to choose the right wallpaper, what you need, how to prepare the wall, mark a plumb line, measure and cut, paste, hang the first strip, match the pattern, trim, and work around outlets, switches and corners.
Before You Start: Which Wallpaper Do You Have?
Wallpaper comes in four types, and the type decides how you hang it. Check the label before you buy paste — using the wrong method on the wrong paper is how seams lift, bubbles form, and paste soaks through the face of the paper.
Paste-the-wall. You roll paste onto the wall and hang dry paper onto it. This is the easiest type for beginners because you never have to handle a wet, heavy strip. Most modern non-woven wallpapers are paste-the-wall, and they are the best place to start.
Paste-the-paper. You paste the back of the paper, then fold it loosely for a few minutes — this is called booking — and hang it. Traditional papers and many vinyls are paste-the-paper. Booking is the step beginners skip, and it is the step that keeps seams tight and the pattern straight.
Pre-pasted. The paste is already on the back of the paper; you dip the strip in a water tray to activate it, then hang it. It is quick and clean, but you have a short working window before the adhesive starts to grab.
Peel-and-stick. No paste at all — the paper has a self-adhesive backing, and you peel it off as you hang. It is forgiving (you can lift and reposition it) and the best choice for renters, but it is pricey per roll and grips firmly once smoothed down.
What You Will Need?
Keep everything within reach before you paste anything. Leaving mid-strip to hunt for a tool is how paste dries and strips go on crooked.
- Wallpaper — of your chosen type, with one spare roll
- Wallpaper paste — the right kind for your paper (paste-the-wall paste, or all-purpose paste for paste-the-paper)
- Paste table — a long fold-out table for pasting and cutting, or a clean floor with a sheet down
- Paste brush or roller — a wide brush or a short-pile roller for the paste
- Pasting bucket and tray — for mixing and holding the paste
- Smoothing brush or plastic smoother — for pressing the paper to the wall and pushing out air
- Sharp snap-off knife and plenty of blades — a dull blade tears the paper; change blades often
- Metal straight edge and a cutting guide — for clean, straight trims at the ceiling and skirting
- Spirit level or plumb line — for marking that first vertical line
- Long tape measure and a pencil — for measuring walls and marking lengths
- Scissors — for cutting strips and trimming around obstacles
- Sponge and a clean bucket of water — for wiping paste off the paper face and the skirting
- Step ladder or platform — safely reaching the ceiling without stretching
- Seam roller — for rolling seams flat without damaging the paper
- Wallpaper primer or lining paper — for sealing porous or patchy walls
- Sandpaper or sanding block — for smoothing filler and rough patches
- Utility knife and a spare blade — for cutting around outlets and switches
- Drop cloth — to protect floors and furniture from paste
- Small artist’s brush — for touching up paste at edges and seams
- Wide masking tape — for holding cut strips and protecting edges

How Much Wallpaper Should You Buy?
There are two ways to get the quantity wrong — buy too little and you run out mid-wall with a third roll on back order, or buy too much and you pay for paper you never open. Do the measuring properly, before you order.
Measure the wall. Measure the width and height of every wall you plan to paper, in metres or feet, and multiply them to get the area. Then subtract nothing — you cannot use the offcuts from a door or window to cover a narrow strip, because the pattern would not match, so most guides count the full wall area.
Calculate with the repeat. A pattern repeat is the vertical distance before the pattern starts again, and it is printed on the roll’s label. Divide your wall height by the repeat, round up to the next whole repeat, and multiply by the number of strips — that tells you how many usable lengths each roll gives you. For a small repeat (under 30 cm), you waste a little; for a large repeat (60 cm or more), expect to waste nearly a full repeat per strip.
Buy one extra roll. Always buy at least one more roll than you calculated, and keep it unopened if you can. Rolls from different dye batches can differ slightly in colour — same roll number, but a different batch matters. If you need a spare later, the batch will have changed.

Step 1: Prep The Wall Properly
Every wallpapering problem you will ever have started with a badly prepared wall. The wall must be smooth, clean, dry and sealed, and getting that right takes longer than the hanging itself. Do not skip it.
Fix what’s wrong first. Fill holes and cracks with filler, let it dry, and sand it smooth. If the wall has loose paint or old paper hanging off in sheets, strip it back to sound plaster first — paste will not stick to a flaking surface.
Sand and fill. Sand the whole wall with fine sandpaper to knock down any texture and give the paste a key. Vacuum the dust off and wipe the wall with a barely damp cloth. On a newly plastered wall, the plaster must be fully dry — it takes two to four weeks — and then sealed with a primer.
Remove switch and outlet covers and old fixings. Turn off the power at the breaker before you remove any cover, and tape the screws to their plates so they do not get lost. Pull out old picture hooks and nails, fill the holes, and sand them smooth.
Wash off dust, grease and nicotine. Wipe the wall with a sugar soap solution and let it dry. Nicotine-stained walls and kitchens with grease need extra cleaning — paste will not bond to a greasy wall, and stains can bleed through the paper and spoil the face.
Prime absorbent or painted walls. If the wall is newly plastered, freshly filled, or painted with a shine to it, roll on a coat of wallpaper primer or diluted paste size — it seals the surface, stops the paste soaking in too fast, and makes the paper easier to strip next time. For a bold colour underneath, a coat of white primer stops it showing through pale paper.

Step 2: Mark A Plumb Line
Do not trust the wall, the corner or the skirting to be straight — none of them are. Your first strip sets the line for every strip that follows, so you must hang it against a true vertical.
Measure in and mark. Measure in from the corner by the width of your paper minus about 2 cm (about an inch for a slight overlap into the corner), and mark a small dot at the top and at the bottom of the wall. Wallpaper strips are about 53 cm wide — measure your own roll, because widths vary.
Draw your plumb line. Hold a long spirit level vertically against the two dots, or drop a plumb line from the top dot, and draw the line down the wall with a pencil. This is the edge your first strip follows — every strip after it is checked against the previous strip, not against the wall.
Mark the rest after the first strip. Once the first strip is up and you have checked it is dead vertical, do not relax: keep measuring as you go, and add a new plumb line every few strips to stop the work drifting — a slow drift across a whole wall shows up clearly once you get to the far corner.

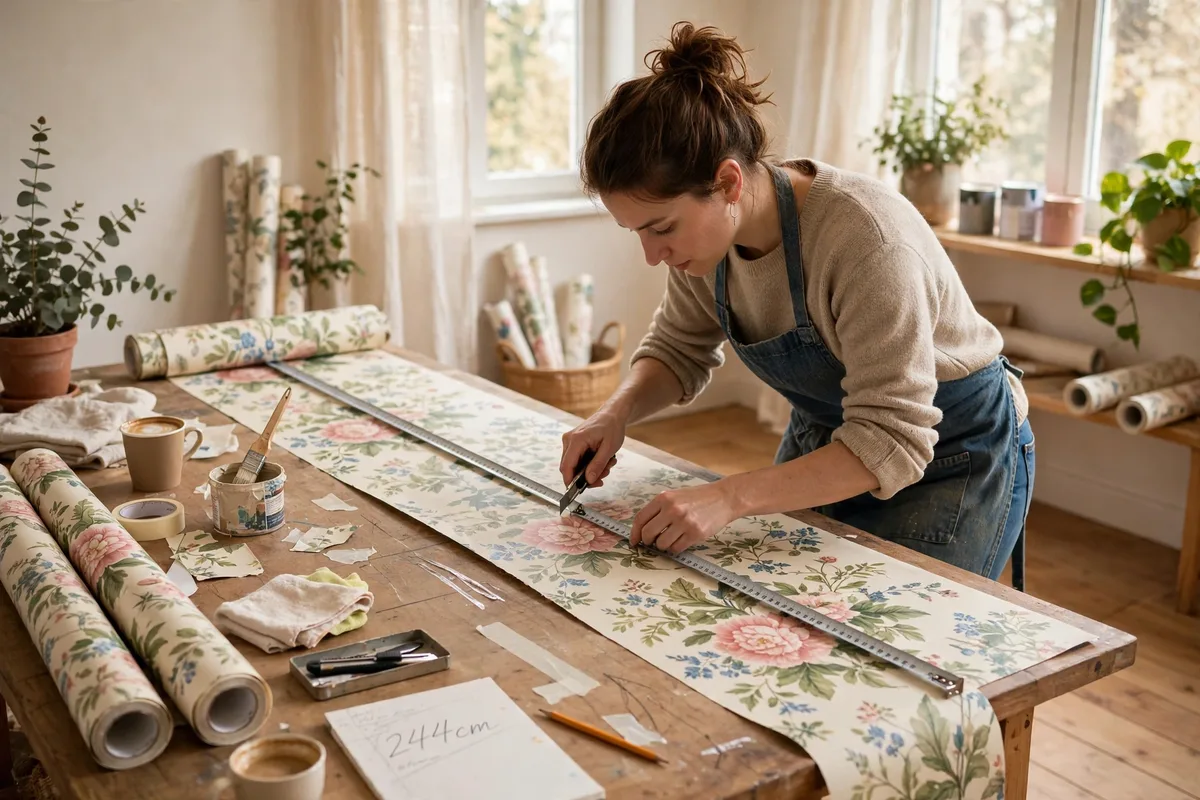
Step 3: Measure And Cut Each Strip
Cut strips one at a time and write the drop number on the back of each in pencil. If you cut a whole roll in advance, the pattern will not line up when the wall is not straight.
Measure the drop. Measure the wall height at the point where the strip will go, and add about 10 cm (4 inches) for trimming at the top and bottom. Cut the first strip at that length — every wall is a different height, so measure each strip, do not assume the first measurement fits everywhere.
Match the pattern before you cut. Lay the cut strip face up next to the roll, slide the roll out until the pattern lines up at the same height, and mark the cut for the next strip. On a pattern with a large repeat, this is where the extra roll pays for itself — do not try to economise by lining up the pattern only loosely, or the seams will jump.
Cut cleanly, at the edge. Cut along the edge of the strip with a very sharp knife, or fold and tear along a straight edge if the paper is thin. A jagged cut is hard to paste and leaves loose fibres at the seam.
Write the drop and the pattern direction on the back. A quick pencil note — strip number and an arrow — stops you hanging a strip upside down, which is the most embarrassing mistake in wallpapering. This is the easiest five seconds of the whole job, and the one most often skipped.
Step 4: Paste The Wall Or The Paper
This is where the type of wallpaper matters most. Get the method right and the rest is smoothing and trimming. Get it wrong and you will be washing glue off the face of the paper — or peeling the strip back down because it never stuck.
Paste-the-wall. Roll a generous, even coat of paste over the wall, slightly wider than the strip and a little deeper than the strip’s length, so the paper never meets a dry patch. Use a roller for speed and a brush to work the paste into the edges and corners. Hang the dry strip straight onto the pasted wall, top first, and smooth it as you go.

Paste-the-paper. Lay the strip face down on the paste table and roll or brush paste down the centre of the strip and out to the edges. Fold the two ends loosely in towards the middle — this is booking — and leave it for the time printed on the label, usually five to ten minutes. Booking lets the paper expand evenly so it will not bubble or pull away once it is on the wall. Do not unfold it until you are ready to hang it.

Pre-pasted. Fill the water tray, roll the strip loosely and dip it in, then pull it through the water so the adhesive wets evenly, and let it drain for a few seconds before you hang it. You have a shorter open time than with paste, so work confidently and do not keep repositioning the strip.
Peel-and-stick. Peel back the top few centimetres of the backing, line the strip up with your plumb line, and smooth it onto the wall a little at a time, peeling as you go. Use a plastic smoother to press out bubbles from the centre toward the edges before the adhesive grabs for good.
Step 5: Hang The First Strip
The first strip decides everything: get it plumb, and the rest follows. Rush it, and every seam after it will be wrong. Work slowly, and remember that paste gives you a few minutes to slide and adjust the strip before it grabs.
Set the strip off at the top. Take the strip to the wall and line its edge up with your plumb line, with about 5 cm of spare paper at the top. Press the top lightly into place and let the weight of the strip pull it down straight.
Brush down from the centre. With your smoothing brush or plastic smoother, press the strip onto the wall from the centre out to the edges, working from the top down. That pushes air bubbles out to the edges instead of trapping them in the middle.
Push bubbles to the edge. If a bubble forms, do not stab it — lift the paper at the nearest edge and brush the air out gently. A stubborn bubble can be sliced with a sharp knife and brushed flat, but try the lift-and-brush first.
Check it is truly plumb. Drop your spirit level against the strip’s edge and check it is dead vertical from top to bottom. If it is not, ease the strip away from the wall, nudge it back into line, and re-smooth. This is the moment when patience pays — rehang the strip now rather than after the next three go up crooked.
Trim the top and bottom later. Leave the extra paper at the ceiling and skirting alone for now — you trim after the strip is fully stuck, not while it can still move. Some of it will need to dry a bit first.

Step 6: Match The Pattern And Hang The Next Strip
Every strip after the first is matched to the previous one, and the pattern tells you where to line it up. Work your way around the wall, checking the match at eye level where it will be seen.
Line up the pattern before you press. Hold the next strip up against the last one, dry, and slide it up or down until the pattern is a perfect match where the two strips overlap — check at least two points along the wall, not just one, because floors and ceilings slope.
Butt the seams tight. Hang the new strip so its edge butts right up against the last one, with no gap and no overlap. On a good hang, the seam is visible only if you look for it — when it is bad, the paper curls or lifts within a day.
Smooth the seam with a small seam roller. Roll the seam lightly with a seam roller to press it flat, working along the whole length. Do not press hard — too much pressure squeezes paste out and stains the paper. Wipe any paste that comes out straight away with a damp sponge.

Step 7: Trim At The Ceiling And Skirting
Trim while the paste is still slightly damp, so the paper cuts cleanly without tearing. Press the paper into the corner where the wall meets the ceiling or skirting, then cut along the crease.
Press the paper into the corner. Run the broad side of your smoothing brush or a plastic smoother firmly into the angle where the wall meets the ceiling or the skirting board, so the paper forms a sharp crease. The crease is your cutting line.
Cut with a fresh blade. Hold your metal straight edge against the crease and cut along it with a sharp snap-off knife, pulling the knife towards you in one steady motion. Change the blade for every strip or two — a dull blade drags and tears, and a tear is almost impossible to hide on a plain paper.
Peel the offcut away gently. Lift the trimmed strip of paper away from the wall, taking care not to pull the strip down with it. If the top starts to lift, press it back with a damp sponge and the seam roller before it dries.

Step 8: Go Around Outlets, Switches And Corners
Outlets, switches and corners are the fiddly bits that slow everyone down. Practice the method on a spare strip first and you will do the real ones cleanly.
Outlets and switches. Cover the box with the strip as if it was solid wall, then find the centre of the outlet by feel and make a small cross cut in the paper from the centre out to each corner. Fold each flap back into the box, and trim the excess around the edge. Replace the cover plate, and the wallpaper should read cleanly under it. Leave the power off until every strip is down and the plates are back on.
Inside corners. Measure the remaining width of the wall, add about 2 cm (an inch) for a little extra, and cut the strip to that width. Paste and hang it, pressing that small extra width around the corner onto the next wall. The next strip starts on the new wall, overlapping that extra piece — because there is no guarantee the corner is straight, the pattern will not match there, but nobody notices the small discontinuity in a corner.
Outside corners. Wrap the strip around the outside corner by the same 2 cm or so, and press it down firmly. Start the next strip on the new wall from a plumb line you marked first — never hang a strip into an outside corner from the previous wall, or it will go on crooked.
Doors and windows. Cut the paper around the architrave using the same cross-cut method as for outlets, trimming the excess to fit neatly around the frame. For a deep reveal, you will need a separate small strip cut to fill the side of the reveal — hang that first, then bring the full strip over it, and the seam will fall on the edge where it is least noticeable.

Troubleshooting: Common Wallpaper Problems
Most wallpaper failures have one of a few causes, and each one has a simple fix. Work through this list before you strip anything off and start again.
- The paper lifts at the edges: not enough paste near the cut edges, or the paste dried before the strip went up. Lift the edge, brush on a little more paste and press it back down.
- Bubbles appear as the paper dries: air trapped under the strip, often because the paste was not brushed out evenly. If the paper is still damp, brush the bubbles out toward the edges. If it is dry, prick them with a pin and press flat.
- The seams show: strong light across the wall makes all seams visible. If the seams are lifting, re-paste; if they are just visible in raking light, live with it — every wallpapered wall shows seams in harsh light.
- The pattern does not line up: the plumb line drifted or the pattern was not matched before cutting. If the mismatch is small, you can sometimes ease the strip into place while the paste is wet; if it is bad, take the strip down and start again — a bad match only gets worse as you add strips.
- The paper goes on crooked: the first strip was not plumb. Strip everything back and re-mark the plumb line — there is no fixing a crooked first strip by adding crooked strips on top of it.
- Paste stains show on the surface: paste left on the face of the paper dries into a shiny patch. Wipe paste off immediately with a damp sponge as you go; on dark or metallic papers, use a barely damp cloth as wet paste can stain the surface permanently.
Is Wallpaper Worth It Compared To Paint?
Wallpaper costs more up front than paint, and it takes longer to put up, so the honest question is whether the result is worth it. In a bedroom or a dining room where you want a pattern or a texture, wallpaper gives you a finish that paint cannot — and it lasts longer. Good wallpaper, hung properly, can last 10 to 15 years, while paint needs refreshing every three to five years. On a feature wall, wallpaper is almost always worth it; on a hallway that takes a beating from bags and shoes, paint is the more practical choice.
The cheapest room to wallpaper is the smallest one. A powder room or a single accent wall needs only a couple of rolls, and the cost of the paper is small compared with the difference it makes. If you are not sure you will like living with a pattern, start there. You can always do the whole room next time.
Frequently Asked Questions
Can I Put Wallpaper Over Old Wallpaper?
Sometimes. One layer of smooth, well-stuck paper can be covered if it is sound, but two layers of paper, or paper that is peeling or textured, will telegraph every bump and may not hold the new paste. If in doubt, strip it — starting clean saves the frustration of a finish that fails.
Can Beginners Hang Wallpaper?
Yes. Paste-the-wall wallpaper is the best beginner option because you paste the wall, not the paper, so there is no wet strip to handle and no booking time to watch. Start with a small wall or a single feature wall, keep your first strip plumb, and take your time.
How Do I Hang Wallpaper Without Bubbles?
Brush the strip out from the centre toward the edges as you hang it, so you push the air out before the paste grabs. If a bubble shows up after the paper is dry, prick it with a pin and brush the paper flat — or inject a little paste under it with a small brush and smooth it down.
How Long Does Wallpaper Take To Dry?
Paste-the-wall and paste-the-paper wallpapers are usually dry to the touch in a few hours, but the paste can take 24 to 48 hours to dry out fully. Keep the room ventilated and do not heat it hard — a hot, dry room can dry the paper too fast and cause seams to pull apart as it shrinks.
Does Wallpaper Hide Uneven Walls?
Not much. Thin paper follows every bump, and a pattern with straight lines will show up a slope at a glance. Thicker papers and busy patterns help, and lining paper hides small blemishes, but proper prep work will give you a far better result.
A brand-new wallpaper wall is the kind of result you notice every time you walk into the room. Take the time to prep, hang the first strip plumb, match the pattern carefully, and the room will reward you for years.