
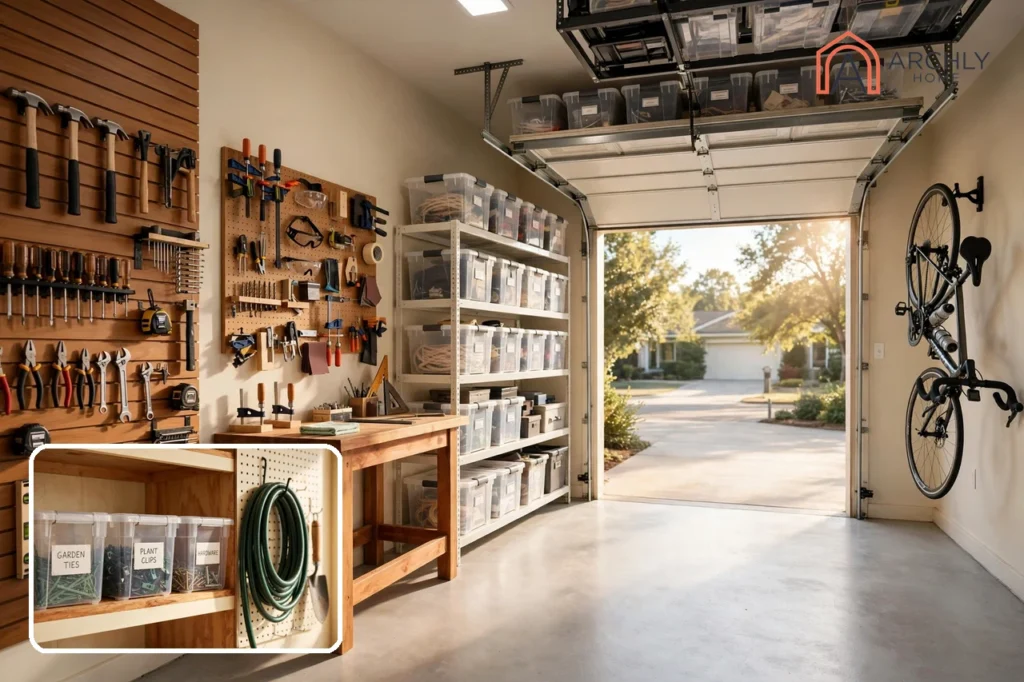
A garage gets organized the same way every time: less stuff in it, everything off the floor, and every item with one clear home. That is the whole secret, and it is also why most garage cleanouts fail — people buy bins before they decide what stays, and they stack storage on the floor instead of using the walls and the ceiling. These 15 garage organization ideas work in the order you should do them: plan and declutter first, then build the walls, the ceiling, and the floor storage, then finish with the workbench and the entry. Most of them are weekend jobs, and the budget tiers at the end show what each one costs before you spend anything.
Three Decisions Before You Spend Anything
Most garage projects go wrong before a single hook is bought. Three decisions come first, and they cost nothing to make.
Decide whether the cars park inside — and defend that space. A standard two-car garage is about 20 by 20 feet, roughly 400 square feet, and a typical car is about 6 feet wide and needs around 30 inches beside it to open a door. That leaves usable wall depth of only 18 to 24 inches on each side. Mark the parking space with painter’s tape on the floor once, and nothing gets stored inside that outline — not the recycling, not the bikes, not “just for now.” If you stop parking a car, you gain roughly 200 square feet for every car you stop parking, which is a different garage entirely.
Pick your tier, then pick your ideas. A do-it-yourself reset runs roughly $115 to $500: a pegboard wall, a steel shelving unit, and a set of clear bins. A full wall-and-ceiling system you install yourself runs roughly $500 to $1,500. Professionally installed cabinetry and custom systems start near $1,500 and run past $5,000. The table at the end of this article puts each idea in its tier, so you can build a plan that fits one number instead of drifting between three.
Learn the height rule, and let it place everything. Daily gear lives between 30 and 60 inches off the floor, where you can grab it without a ladder. Heavy items stay low. Anything you use only a few times a year goes above 78 inches or overhead. Once you know that rule, half the decisions in this article make themselves.
Plan First: Measure, Declutter, And Zone
A garage has no closets and no built-in shelving, so it collects whatever has no other home. The plan fixes that before the storage does.
1. Map The Garage Before You Buy Anything
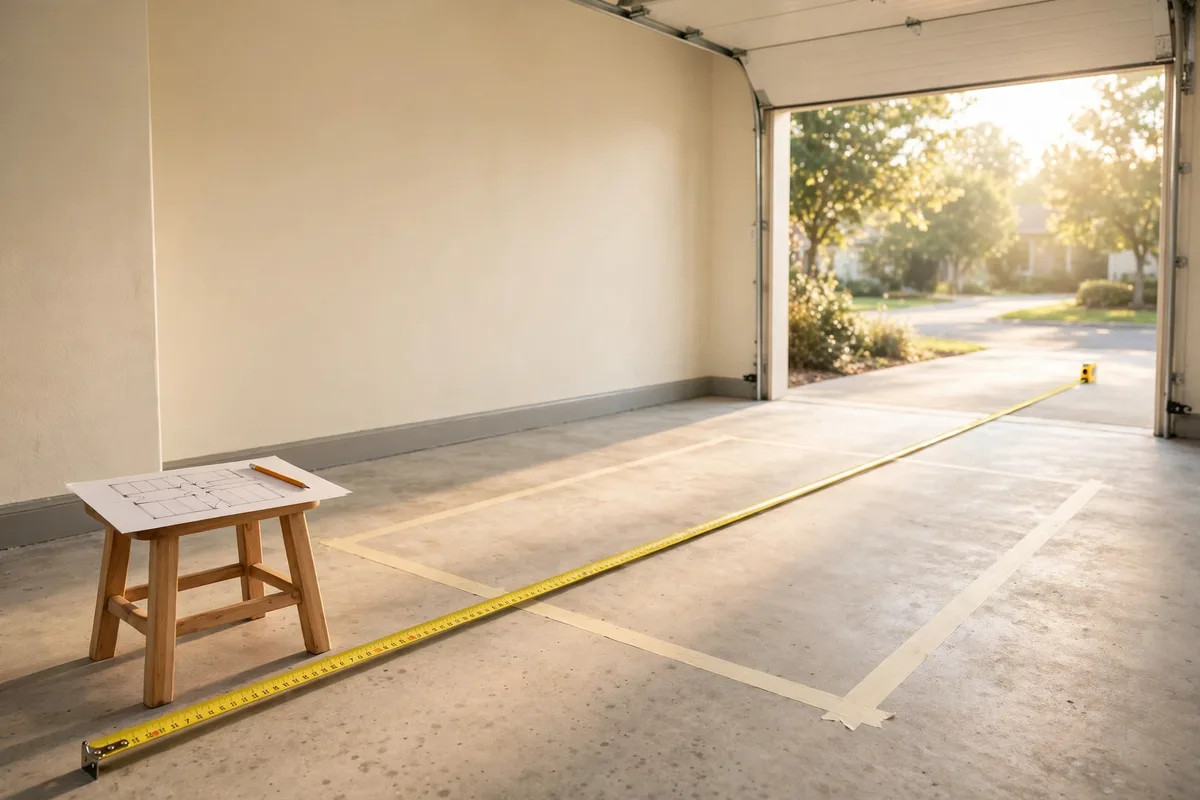
Take the garage’s dimensions before you buy a single hook: the length and width of each wall, the ceiling height, and the size and location of the windows, doors, switches, and receptacles. Sketch it on paper and mark the parking outline, the door swings, and the walkway from the house door to the garage door. Then write down what frustrates you now: the bikes block the car, the tools live in three places, the holiday bins bury the lawn mower. Fix those three things first and add style on top.
Tip: measure the longest item you own — the ladder, the kayak, the lumber — before you plan anything. Long items decide where the ceiling racks and the tall wall hooks go, and a rack that is six inches too short is a rack you cannot use.
2. Declutter In Sections, Not All At Once
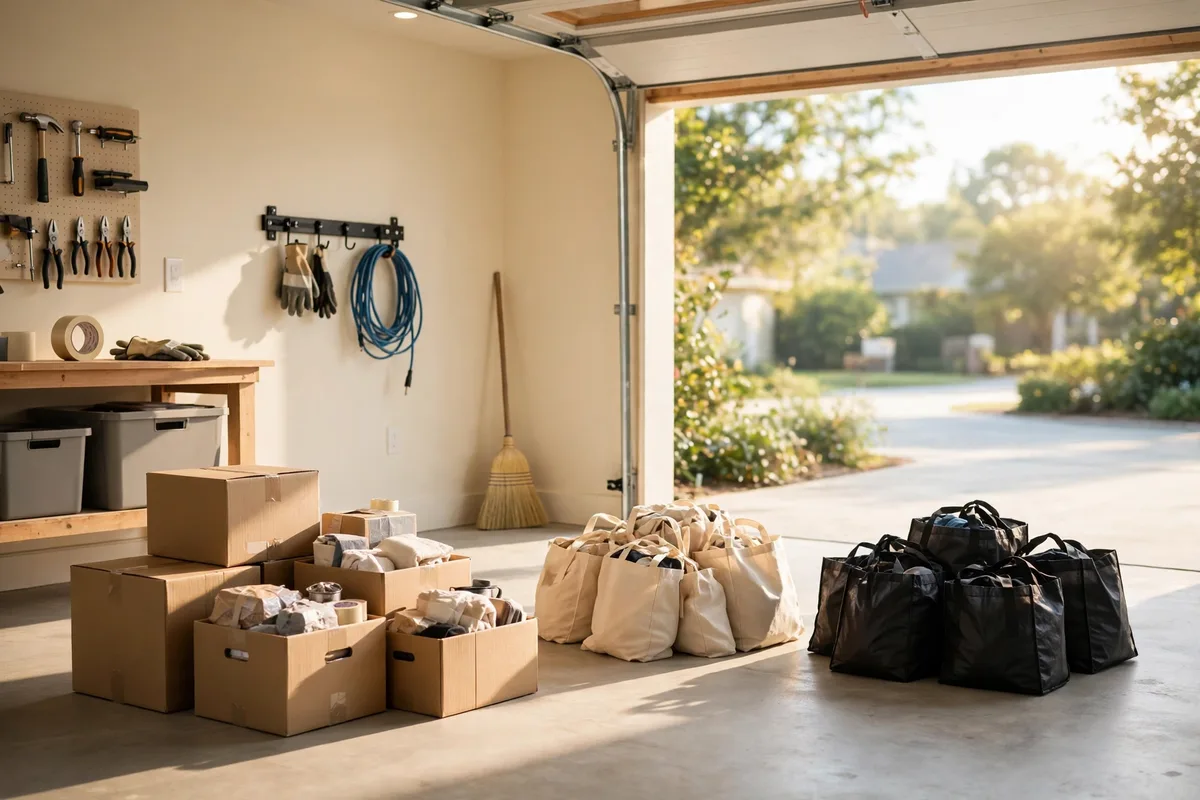
The fastest way to organize a garage is to have less in it, and the most common mistake is pulling everything onto the driveway at once. The driveway cleanout ends the same way every time: exhaustion, darkness, and everything going back inside. Work one section at a time — one wall, one shelf, one workbench — and finish it before you start the next. Sort each section into four piles: keep, donate, sell, and toss. A useful rule for the arguments: if something has not been used in two full seasons and it is replaceable for under about $50, it goes.
Tip: get the donate pile into the car the same day. A donation pile that stays in the garage is just clutter with good intentions. Hazardous items — old paint, solvents, pesticides, car batteries, propane cylinders — do not belong in the household trash; most towns run a hazardous-waste collection day or a drop-off site, and retailers usually take batteries back.
3. Zone The Garage By Job

Zoning is the cheapest of all garage organization ideas and the one people skip most often. Assign each wall or corner a job, and everything that belongs to that job lives there. A practical layout for a two-car garage has five zones: parking, tools, garden, sports, and seasonal. Put the tools near the workbench, the garden gear near the door to the yard, the sports gear low where kids can reach it, and the seasonal bins up high or in the back. Mark each zone with a simple label or a strip of painter’s tape on the wall so the whole household knows where things go back.
Tip: group by how often you use things, not just by category. Your drill logically belongs with the other power tools, but if you use it every week, it should live at arm’s reach near the house door — not in a box at the back of the tool zone.
Walls: The Cheapest Storage In The Room
Floor space is the most valuable part of a garage. Walls are free real estate, and every idea in this section uses them before a single shelf touches the floor.
4. Put Up A Slatwall Or Track Wall
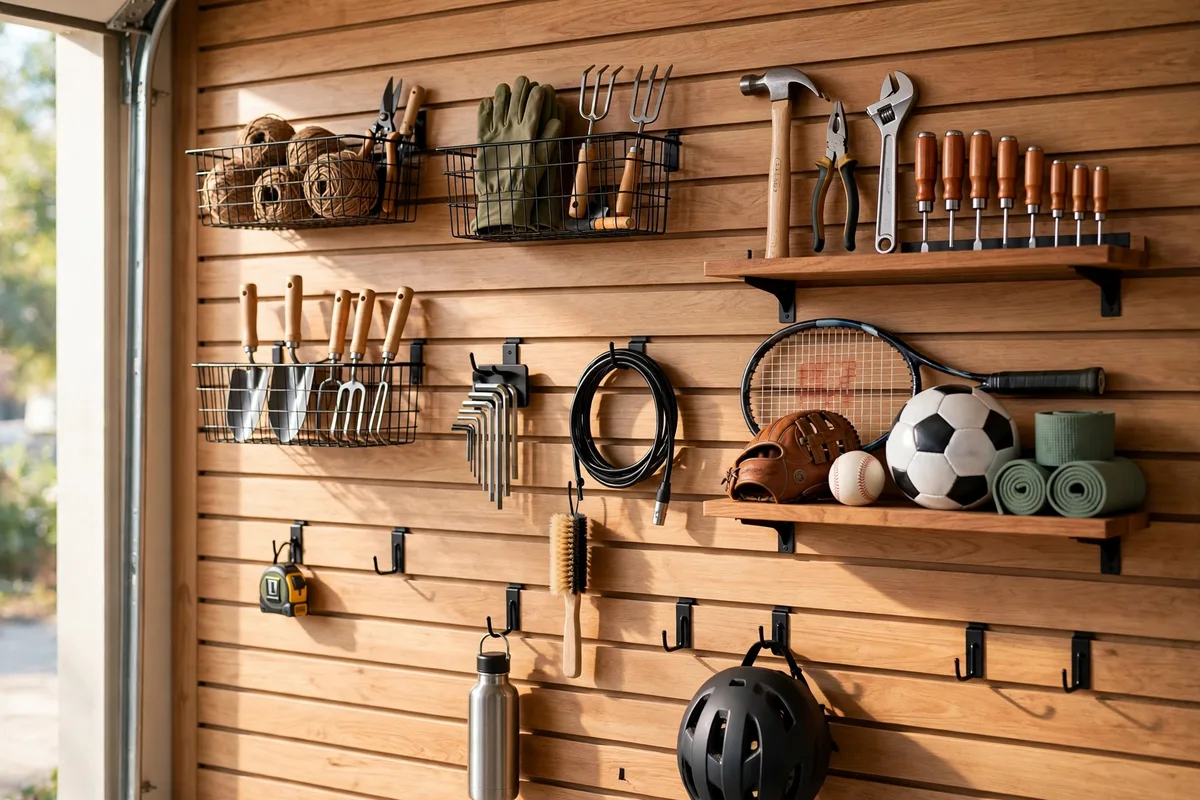
A slatwall or track system is the single best starting point for most garages, because hooks, baskets, and shelves snap on and off in seconds and move whenever your needs change. Slatwall panels cover a whole wall and accept hundreds of accessory types; a 4-by-8-foot section is reported to cost roughly $100 to $300. A track system is a horizontal rail that screws into the studs, with hooks that slide along it — a starter kit covering roughly 6 to 10 linear feet is reported to cost roughly $60 to $200. Track rails are best for heavy, awkward items like ladders, bikes, and wheelbarrows; slatwall is best when you want a whole wall that can change. This Old House’s 19 garage organization tips compare pegboard, track, and panelized systems side by side, with the pros and cons of each.
Tip: anchor everything into studs, which sit 16 or 24 inches apart — never into drywall alone. A hook rated for 50 pounds holds nothing if the screw behind it is holding drywall. If you cannot drill — a rental, or block walls — skip to freestanding steel shelving and a rolling tool chest, which do the same job without a screw.
5. Hang A Pegboard Over The Workbench

Pegboard is the cheapest wall storage there is, and it is still the best answer for the wall above a workbench. A 4-by-8-foot sheet of tempered hardboard is reported to cost roughly $15 to $30, plus a starter hook set, and a 4-by-4-foot panel with hooks is reported to run roughly $30 to $60. Mount it on furring strips so the hooks have room to seat, and trace each tool’s outline on the board once — put-away becomes automatic, and a missing outline tells you at a glance what is still out. Metal pegboard holds far more than hardboard and the holes do not tear out, so it is worth the upgrade if you hang anything heavy.
Tip: keep pegboard for light and medium tools. It is not sturdy enough for bicycles or heavy power tools, and hardboard absorbs moisture and can swell in a damp garage. Heavy items belong on the track wall or on shelf brackets, not on pegs.
6. Store Long Tools On A Rail

Shovels, rakes, brooms, and hoses lean against the wall, fall over, and block the walkway — until they get a rail. One rail at about 60 inches off the floor handles most long-handled tools; add a second rail at about 78 inches for ladders. Spring-loaded grippers hold each handle in its own slot, so a tool goes back in one motion and stays put. A simple wooden cleat with heavy-duty hooks does the same job for about $30 in materials, and a length of PVC pipe cut into short holders makes a tool rack for under $15.
Tip: put the garden rail on the wall nearest the yard door, not the back wall. Tools stored where they are used get put back; tools stored across the garage get leaned against the nearest wall instead.
7. Lift The Bikes Off The Floor
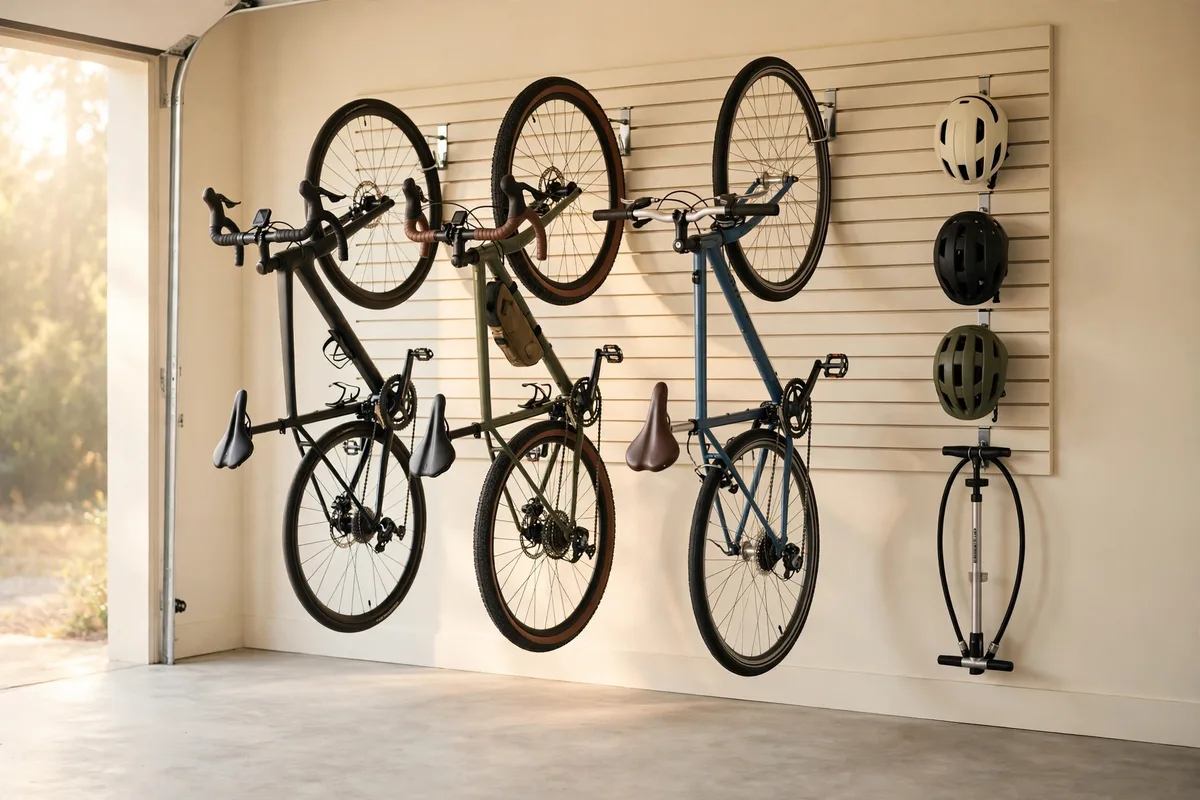
Four bikes leaning against a wall eat a car-sized patch of floor. Hang them by the front wheel on vertical wall hooks and a family of four fits in the wall space one bike used to block. Vertical hooks are reported to cost roughly $15 for a two-pack, which makes them one of the highest-impact buys in the whole garage. A ceiling hoist with a rope-and-pulley kit, reported at roughly $20 to $40, lifts a bike you ride rarely up against the ceiling entirely. Keep helmets, pumps, and locks on hooks right beside the bikes, so nobody searches the house for a helmet while friends wait at the curb.
Tip: hang adult bikes high and kids’ bikes low, on hooks the child can manage alone. If a bike needs an adult and a step stool to come down, it will not get put back — it will get leaned against the wall.
Ceiling And Floor: Use The Space You Forget
The ceiling holds the things you need a few times a year. The floor holds only the pieces that genuinely need a footprint — and each one gets a depth budget.
8. Send Seasonal Gear To The Ceiling
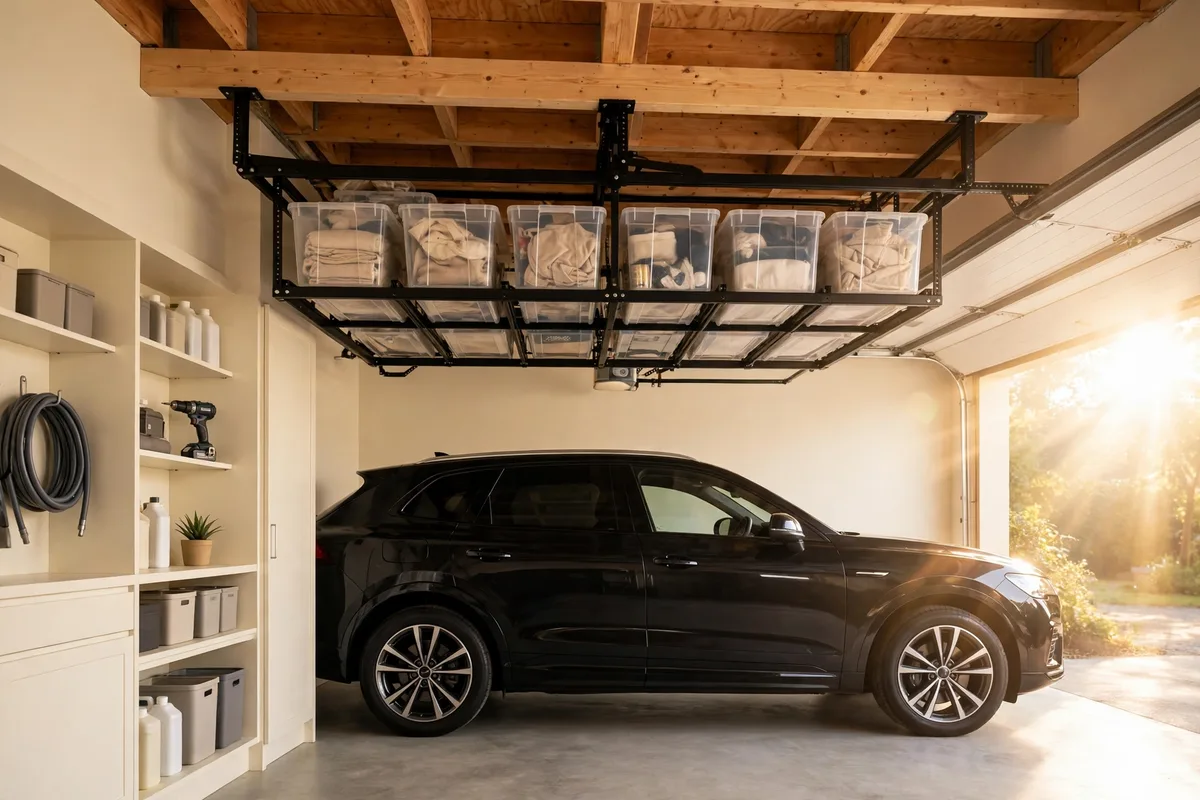
An overhead rack is where holiday bins, camping gear, luggage, and off-season sports equipment belong, because it uses space that would otherwise stay empty. A standard 4-by-8-foot rack is reported to cost roughly $100 to $250 and is typically manufacturer-rated at 500 to 800 pounds — but that rating only holds if every upright is lagged into solid ceiling joists with the hardware in the box. A 4-by-8 deck fits six standard 27-gallon totes in a single layer, two rows of three, so count your bins before you buy. Keep at least 7 feet of clearance under a loaded rack so you do not clip your head or the car’s roof, and check the garage door’s open travel first — the door, its tracks, and the opener all live up there too.
Tip: this is the one job on the list where getting it wrong drops several hundred pounds onto a car. Fastening into drywall, or into the diagonal web members of an engineered roof truss, is not a reduced capacity — it is no capacity at all. Load the deck evenly, and if you plan to hang heavy loads from engineered trusses, ask a structural engineer or your builder first.
9. Build The Bin Wall

Steel or wire shelving is the workhorse of garage storage: a unit is reported to cost roughly $60 to $150, is rated at 250 to 1,000-plus pounds per shelf, and assembles in an afternoon. Keep each unit 18 to 24 inches deep — anything deeper becomes two rows, and the back row disappears. Set the lowest shelf 4 to 6 inches off the slab, because garage floors get wet. Fill the shelves with clear bins with lids, reported at roughly $25 to $45 for a set of six, and label the short end, which is the face you will see. The same clear-bin habit that keeps a small space readable works here at garage scale: label what is inside in plain words, and skip “Misc.” entirely — “Miscellaneous” is not a category, it is where decisions go to hide. Our guide to under-sink storage ideas shows the same labeling and grouping habits working in the smallest storage space in the house.
Tip: leave some empty space on every shelf. A full shelf is a shelf that is about to become a pile, and a garage needs room for the things your family has not bought yet — because they will.
10. Add Lockable Cabinets For Chemicals And Valuables
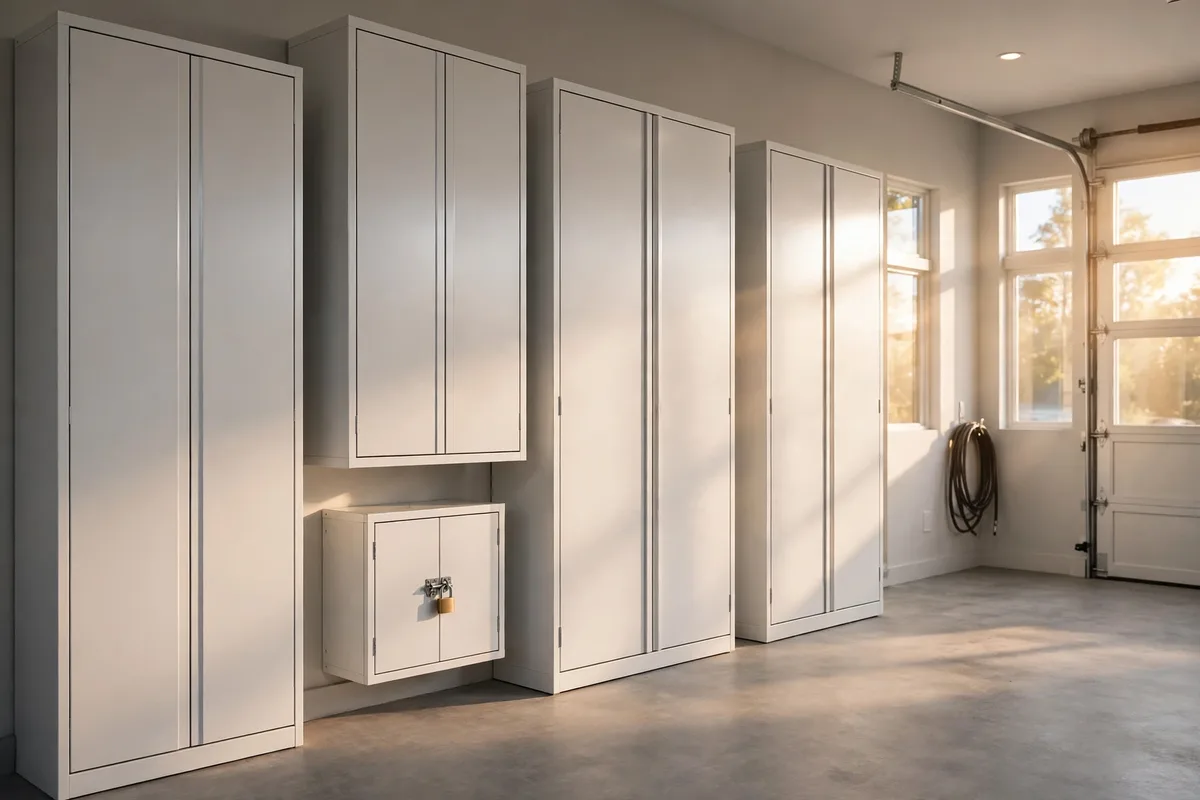
Open shelves keep things visible; cabinets hide the clutter you would rather not look at, keep dust off everything, and lock chemicals and power tools away from children. A steel cabinet unit is reported to cost roughly $150 to $500, and a full wall of steel cabinet sets is reported to run roughly $300 to $1,500. Put the hazardous shelf here: automotive fluids, cleaning products, fertilizers and pesticides, paints and solvents, all in their original labeled containers, on a high shelf or behind a locked door. A cheaper middle path is a used kitchen cabinet set, which installs just as well and costs a fraction of retail.
Tip: do not store paint or propane in the garage at all if you can avoid it. Extreme heat and cold can ruin paint, and propane tanks should always be kept outdoors — a spark can ignite the fumes. Pet food belongs inside too, sealed in a hard container, unless you enjoy feeding the local wildlife.
Workbench And Entry: Make The Garage Work For You
Storage is only half the job. The garage also has to work — as a workshop, and as the door your family actually comes home through.
11. Build A Workbench That Earns Its Floor Space

A workbench is a storage system in disguise: a top 6 to 8 feet long, 24 to 30 inches deep, and 30 to 36 inches high, with a lower shelf for project materials and the wall above it given to the tools you reach for most. Build one from a solid-core door and 2-by-4s for under $100, or buy a steel bench with a built-in vise for roughly $200 to $400. Put it under a window or the brightest fixture, give it its own outlet, and keep your ten most-used tools within arm’s reach while you work. In a small garage, a wall-mount fold-down bench is the better answer: a sturdy surface that tucks flat against the wall when you do not need it, freeing the floor for the car.
Tip: flank a simple worktable with shelves and add pegboard above instead of buying a bench with built-in drawers. Built-in drawers are pricey, and a bench with shelves beside it and a tool wall above it holds more for less money.
12. Make A Rolling Cart Your Mobile Workshop

Some jobs happen in the driveway, not at the bench. A rolling tool cart — three tiers, swiveling casters, a handle — keeps the tools for one job together and follows you to the car, the yard, or the workbench, then parks against a wall. Fill it by job, not by category: one cart for car detailing, one for painting, one for the garden. A rolling tool chest is the one piece of floor storage worth keeping mobile, because it is the only storage that moves to the work instead of making the work come to it.
Tip: keep the cart’s top clear. A cart with a clear top is a mobile work surface; a cart with a pile on top is a shelf on wheels, and it will not roll anywhere.
13. Create A Drop Zone By The House Door

In many homes, the garage door into the house is the real front door — and it is where entryway clutter starts. A small drop zone there catches shoes, backpacks, and keys before they spread through the kitchen: a bench or sturdy stool for putting shoes on, wall hooks for coats and bags, a boot tray or mat to catch mud and rain, and a small shelf or basket for keys and sunglasses. Give each family member one hook and one cubby, and keep the zone small with firm boundaries, or it will quietly take over the whole wall. Our guide to mudroom shoe storage ideas covers the same entry-zone thinking in more detail, with shoe storage that works in tight spaces.
Tip: do a quick weekly reset of the drop zone — move anything that does not belong back to its zone, and limit each person to one bag and one pair of everyday shoes. A drop zone that overflows is just a new pile with hooks.
14. Finish The Floor So The System Lasts

A dingy concrete floor looks worse once everything around it is tidy, and it is harder to clean than the storage is. An epoxy floor coating resists oil stains and wipes clean as easily as a kitchen counter, and an all-inclusive kit is a realistic weekend project — the key is diligent prep work, namely a clean, dry slab, and a few days of temperate weather for drying. Interlocking floor tiles are the faster alternative: they protect the concrete from automotive fluids, give traction in wet conditions, and create a visual boundary that defines the parking zone. Either way, sweep or vacuum first before you bring out water or cleaners — otherwise you are just making mud — and soak up oil, antifreeze, or chemicals with kitty litter instead of hosing them down the driveway and into the storm drain.
Tip: seal the threshold too. Rain, windblown leaves, bugs, and mice find their way in if the bottom of the garage door does not sit flush with the floor, and a rubberized strip where the door lands closes that gap for the price of a lunch.
15. Light It Up And Label Everything

The best storage system in the world fails in a dark garage, because you cannot find what you cannot see. Most garage lights are not bright enough for repairs, so add task lighting over the workbench and bright overhead fixtures spaced to cover the whole room — and swap in receptacles with ground-fault circuit interrupters, which cut the power when there is a short. Then label everything, because you will not remember what is in the third gray bin from the left. Nobody does. Be specific: “Holiday Lights And Extension Cords” beats “Holiday Stuff,” and a label on the short end of every bin means you read it from the ladder, not from the floor.
Tip: a label maker is the cheapest finishing touch in the garage, and picture labels work for younger kids who cannot read yet. When every bin and hook is labeled, the system maintains itself — because anyone in the house can put a thing back without asking where it goes.
Five Mistakes That Undo A Garage Organization
- Buying storage before decluttering. You will buy bins for things you are about to get rid of.
- Moving everything onto the driveway. See: become exhausted, realize it is getting dark, put everything back.
- Keeping too much “just in case.” The garage should not become a fulfillment center for a business you are not actually running.
- Creating complicated systems. If putting something away takes more than one step, it will not get put away.
- Filling every shelf. Leave room for growth, or the next thing you buy has nowhere to go but the floor.
What Each Idea Costs?
| Idea | Budget Tier | Reported Approximate Range |
|---|---|---|
| Map the garage, declutter, zone it | Free | $0 |
| Pegboard wall with hooks | DIY reset | $30–$60 |
| Garden tool rail or PVC rack | DIY reset | $15–$40 |
| Vertical bike hooks | DIY reset | $15 per pair |
| Clear bins and labels | DIY reset | $25–$45 for six bins |
| Steel shelving unit | DIY reset | $60–$150 |
| Track wall starter kit | DIY reset to full system | $60–$200 |
| Slatwall section (4×8 ft) | Full system | $100–$300 |
| Overhead ceiling rack (4×8 ft) | Full system | $100–$250 |
| Steel cabinet unit | Full system | $150–$500 |
| Workbench (DIY door-and-2×4 build) | DIY reset | Under $100 |
| Workbench (steel, with vise) | Full system | $200–$400 |
| Full wall-and-ceiling system, DIY | Full system | $500–$1,500 |
| Installed cabinetry and custom systems | Professional | $1,500 and up |
Ranges above are reported approximate figures from the sources studied for this article, not quotes — your local prices will vary with size, material, and brand.
The Short Version
Start with the parking outline, declutter one section at a time, and zone the room before you buy anything. Put the walls to work first — a track or slatwall wall, a pegboard over the bench, a rail for long tools, hooks for the bikes — then send the seasonal gear to the ceiling and the everyday gear into labeled bins on steel shelving. Lock the chemicals away, give the workbench a real job, build a drop zone by the house door, and finish the floor and the lighting so the system is easy to keep. Then keep it with a short reset at the start of each season: return misplaced items to their zones, review what you no longer use, and update the labels. A few minutes a week is a lot easier than another all-day cleanout.
Frequently Asked Questions
How Much Does It Cost To Organize A Garage?
A do-it-yourself reset — decluttering, a pegboard wall, a steel shelving unit, and clear labeled bins — is reported to run roughly $115 to $500. A full wall-and-ceiling system you install yourself runs roughly $500 to $1,500. Professionally installed cabinetry and custom systems start near $1,500 and run past $5,000. Most two-car garages get most of the benefit at the first tier.
Where Should I Start Organizing My Garage?
Start by deciding what the garage is for — parking, workshop, sports gear, garden storage — and rank those jobs, because the ranking decides who gets the best real estate. Then declutter one section at a time, mark the parking space with tape, and zone the room before you buy any storage. Storage bought before the plan usually ends up holding things you were about to get rid of.
Can I Install Overhead Garage Storage Myself?
Yes, if you are comfortable finding ceiling joists and can lift the rack into place with a helper — fixed racks are the easiest, and drop-down racks have more moving parts but are still a one-day job for a confident do-it-yourselfer. The rating only holds if every upright is lagged into solid joists; drywall, or the diagonal webs of an engineered truss, gives no capacity at all. If you plan to hang heavy loads from engineered trusses, ask a structural engineer or your builder first.
How Do I Organize A Small Garage?
Use the walls and the ceiling before you add anything to the floor: one slatwall or track wall, a fold-down workbench, vertical bike hooks, and an overhead rack for seasonal bins. Keep shelving 18 to 24 inches deep so it does not eat the parking space, use a rolling cart instead of fixed cabinets, and put the most-used gear at waist-to-shoulder height near the house door.
How Do I Keep My Garage Organized After I Finish?
Keep the system simple enough that putting something away takes one step, label every bin and hook, and do a short reset at the start of each season — return misplaced items to their zones and review what you no longer use. A 15-minute tidy once a month and a donation box kept near the garage door will keep the clutter from creeping back onto the floor.