
A flower bed is the fastest way to turn a plain yard into a garden. One well-planted bed gives you color at the front door, a reason to look out the window, and something different to see every month from spring to fall. The trick is not buying more flowers. It is choosing the right bed for the spot you have, planting it in layers, and mixing plants that bloom at different times so the color never runs out all at once.
These 12 ideas cover the whole yard: the strip along the house, the middle of the lawn, the walk to the door, the shade under a tree, and the fence line nobody looks at. Each one tells you where it works, how wide to make it, what to plant, and the one mistake that ruins it. Pick two or three that fit your yard and your time, and start there. A small bed planted well beats a big bed planted in a hurry, every time.
Plan The Bed Before You Plant It
Every good flower bed starts with three decisions, and all three cost nothing. Get them right and the planting almost takes care of itself. Get them wrong and no amount of pretty flowers will save the bed.
Count the sun first. Stand in the spot at mid-morning, at noon, and in the late afternoon, and note how much direct sun it actually gets. A bed that gets six or more hours of direct sun is a full-sun bed, and it will take the widest range of flowers. A spot with three to six hours, or dappled light through a tree, is part shade. A spot that sees almost no direct sun is full shade, and it needs shade plants, not sun plants forced to cope. Most flower beds fail because sun-loving plants were put in shade, or shade plants were left to scorch. Match the plant to the light and half your work is done.
Make the bed wide enough to layer. A bed that is only a foot or two deep can hold a single row of flowers and not much else, and it will always look thin. A bed three to four feet deep holds three layers: tall plants at the back, medium plants in the middle, and low edging plants at the front. That layering is what makes a bed look full and finished instead of flat. If you are planting against a wall or fence, four feet is the sweet spot. If the bed is an island you walk around, make it at least five or six feet across so the middle layer has room.
Repeat a few plants instead of buying one of everything. A bed with twenty different plants in ones and twos looks scattered, however pretty each flower is on its own. A bed with six or seven kinds of plants, each repeated in groups of three, five, or seven, looks designed. Pick one or two anchor colors and repeat them through the bed, then let the rest of the planting support them. This one habit separates beds that look professional from beds that look like a garden-center trolley tipped over.
Tip: lay the shape out with a garden hose before you dig anything. A hose shows you the curve at full size, and you can live with it for a day, mow around it, and look at it from the street before a single spade goes in. Straight lines suit modern houses; soft curves suit cottages and older homes. Either way, make the curve bold and simple — shallow wiggles look fussy and are hard to mow around.
No ground to dig at all? Clustered pots on a patio or balcony still read as a flower bed when they are grouped tightly and share one or two colors. Containers work for flowers the same way they work for food — our guide to growing tomatoes in containers covers the same drainage and watering basics that potted flowers need.
1. Start With A Layered Foundation Bed Along The House

The strip along the base of the house is the most visible bed most homes have, and it is usually the most neglected. A layered foundation bed softens the hard line where the wall meets the ground, hides the bare foundation, and frames the front door. It is the first thing visitors see, and it sets the tone for the whole yard.
Build it in three layers. Put evergreen shrubs or a flowering shrub at the back, close to the wall — boxwood, a compact hydrangea, or a small rose bush, depending on the light. Fill the middle with perennials that bloom through summer: salvia, coneflowers, daylilies, or catmint. Finish the front edge with low flowers that spill slightly over the edge: sweet alyssum, creeping phlox, or low petunias. Keep the bed at least three to four feet deep so the layers have room, and leave a hand’s width of bare soil between the plants and the wall, where the ground stays dry under the roof’s overhang.
Mind the windows and the door. Anchor the corners of the bed and either side of the front door with the tallest, most structural plants, and keep anything tall well clear of windows. A shrub that blocks a window will be cut back hard every year and will never look right. Mulch the whole bed two to three inches deep after planting — foundation beds bake against a sunny wall, and mulch is what keeps the soil from drying out by noon.
Tip: hydrangeas are the classic foundation shrub for a reason, but they need a yearly prune to stay in shape. Our guide on how and when to prune hydrangeas explains the timing so you do not cut off next year’s flowers by mistake.
2. Carve An Island Bed Into The Middle Of The Lawn

An island bed floats in the middle of the lawn, seen from every side, and it turns an empty stretch of grass into the centerpiece of the yard. It works best where the lawn feels too big and too flat — a wide front yard, or a back garden with nothing to look at from the patio.
Plant tallest in the middle, lowest at the edges. Because you walk all the way around an island bed, the height has to fall away in every direction. Put one strong centerpiece in the middle — a small ornamental tree, a tall grass, or a large shrub — then ring it with medium perennials and finish with low edging plants all the way around. Make the shape generous and simple: an oval or a soft teardrop reads far better than a small circle, and island beds always look smaller once they are planted than they did on paper, so make it bigger than feels natural.
Keep the edge crisp. The clean line between lawn and bed is what makes an island bed look deliberate instead of accidental. Cut the edge with a spade, then re-cut it two or three times a season. Strip the turf inside the shape, dig in plenty of compost, and mulch well to keep the weeds down while the plants fill in. In the first year the bed will look sparse — that is normal. Perennials need a season to settle, and by the second summer the layers will close up.
Tip: site the island where you can see it from the window you look out of most. A bed you see every morning gets watered and weeded. A bed tucked out of sight gets forgotten by July.
3. Line The Front Walk With A Low Flower Border

The walk to the front door is the one path every visitor takes, and a low border of flowers along it turns a plain walk into a welcome. This is the simplest flower bed idea on the list, and it is often the most effective, because it is seen up close, at walking pace, by everyone who comes to the house.
Keep it low and fragrant. Plants beside a path should stay knee-high or shorter, so nobody has to push through them, and they should reward a brush of a passing sleeve. Lavender, catmint, and pinks release scent when touched, and they stay compact enough to behave. Behind them, a row of slightly taller flowers — salvia, coreopsis, or dwarf daylilies — gives the border its color. Repeat the same plants down both sides of the walk so the eye travels to the door instead of stopping at a jumble.
Plant for the seasons, not just for June. A walkway border planted only with summer annuals looks bare for half the year. Tuck spring bulbs along the back in fall, so the first color arrives in March and April, then let the summer flowers take over. A few low evergreens — a dwarf boxwood or a clump of ornamental grass — hold the border together through winter.
Tip: leave six inches of bare soil or gravel between the planting and the paving edge. Plants that flop onto the path after rain become a trip hazard, and a clean gap keeps the walk safe and the border tidy.
4. Build A Raised Flower Bed You Can Tend Standing Up

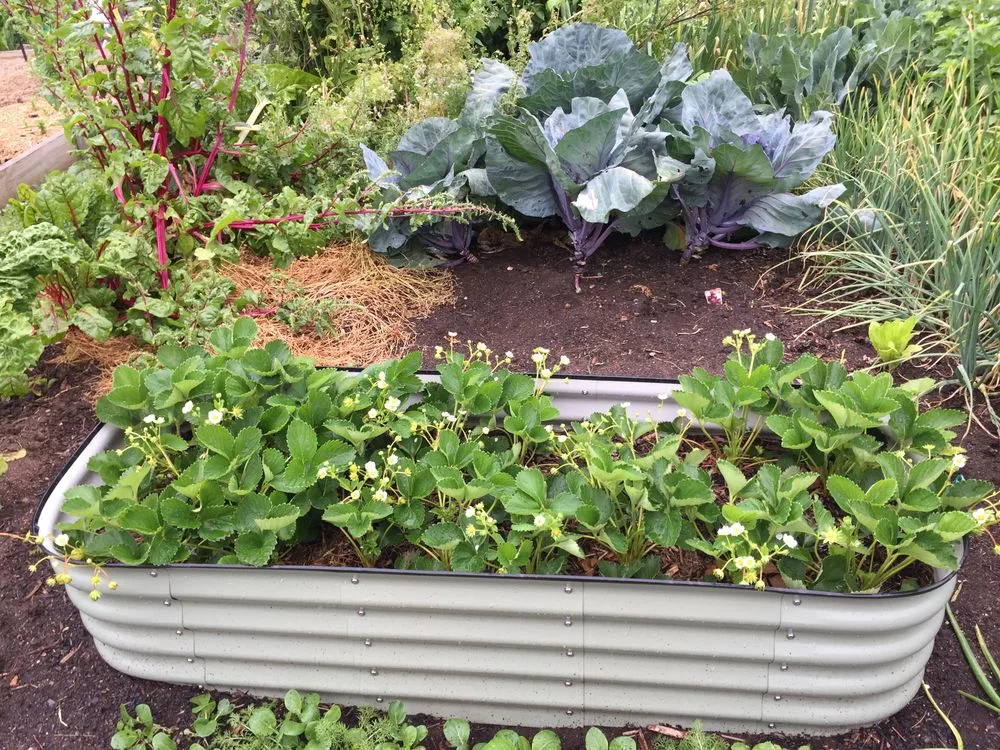
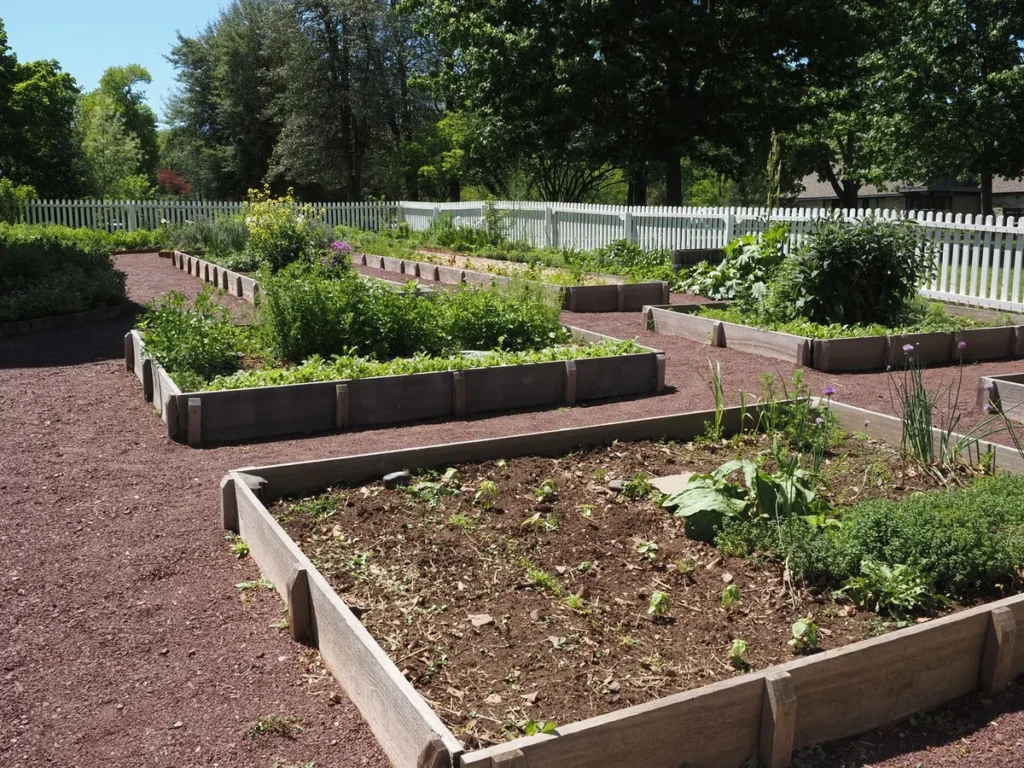
A raised bed lifts the flowers closer to eye level, gives the planting instant structure, and lets you control the soil completely. It is the right answer when the ground soil is poor, heavy clay, or full of stones — and it is kinder on the back, because the planting and weeding happen at waist height instead of ground level.
Keep it narrow enough to reach across. Build the frame from cedar, brick, or stone, and keep the bed no more than four feet wide if you reach it from both sides, or two feet wide if it sits against a wall. Any wider and you will end up standing on the soil to reach the middle, which compacts it and defeats the purpose. A height of twelve to eighteen inches is enough for most flowers, and it keeps the frame low enough to look like part of the garden rather than a box dropped on the lawn.
Fill it properly, then plant the edges. A raised bed is only as good as its fill. Our guide to how to fill a garden bed walks through the layers — drainage at the bottom, good topsoil mixed with compost above it — and the same method works for flowers. Once the bed is filled, plant trailing flowers along the front edge — trailing lobelia, sweet alyssum, or creeping thyme — so they spill over the frame and soften the hard line. The soil level will settle in the first few weeks, so top it up with compost each spring.
Tip: the same raised frame that holds flowers can hold vegetables, and many gardeners run one bed for flowers and one for food side by side. If that appeals to you, our guide to how to start a vegetable garden covers the layout and soil basics that carry straight across.
5. Ring A Tree With Shade-Loving Flowers

The bare ground under a tree is one of the hardest spots in any yard. Grass thins out, roots show through, and the mower scalps the soil. A ring of shade-loving flowers turns that awkward patch into a lush collar of planting — and it protects the trunk from mower damage at the same time.
Never pile soil against the trunk. This is the one rule that matters most. Adding a deep layer of soil or mulch over the roots can smother them and rot the bark. Instead, plant small shade plants into the existing soil between the roots, and mulch lightly around them, keeping the mulch a few inches away from the bark. Choose plants that are built for dry shade: hostas, ferns, astilbe, and hardy geraniums all cope with the competition from the tree, and spring bulbs planted in fall will flower before the canopy fills in.
Water well in the first season. A tree drinks hard, and the soil under a canopy stays dry even after rain. New plants need regular watering until their roots are established, so water deeply once or twice a week through the first summer rather than sprinkling a little every day. After that, the planting largely looks after itself. A simple stone or brick ring around the bed defines the edge and keeps the mower at a safe distance.
Tip: if the tree is young and the roots are still shallow, skip the ring bed for a year or two. Planting under a very young tree disturbs the roots just when the tree needs them most.
6. Run A Long Border Along The Fence
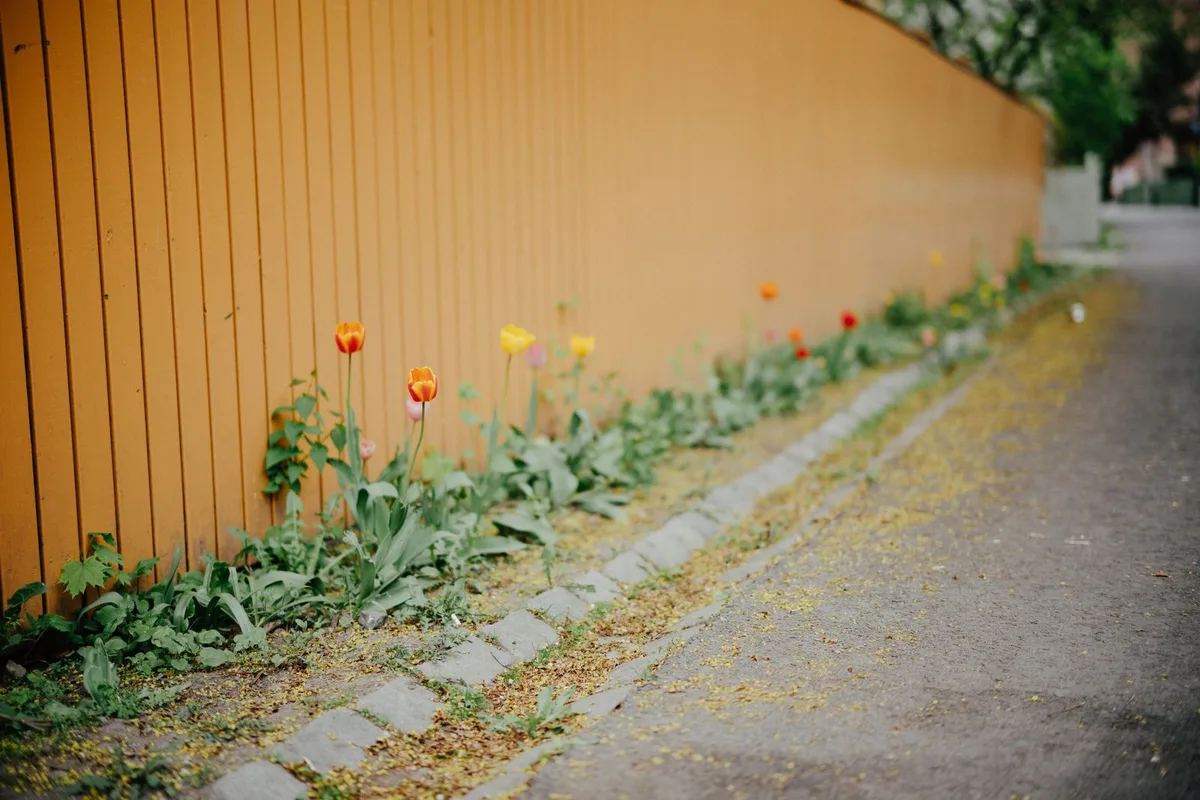
A fence is a wasted opportunity until it has flowers in front of it. A long border along the boundary hides a plain fence behind a wall of bloom, uses space that would otherwise grow weeds, and gives the garden its longest ribbon of color. It is also the easiest bed to plant well, because the fence gives you a backdrop and a support in one.
Depth is everything. A border along a fence needs to be four to six feet deep to hold three layers of planting. A thin strip can only hold a single line of plants, and it will always look mean. Use the fence for climbers — a climbing rose, clematis, or honeysuckle — then plant tall perennials and grasses in front of them, stepping down to low flowers at the front edge. Repeat a few key plants along the length in drifts of three or five, so the border reads as one design instead of a row of singles.
Plan the color in blocks. A long border is where color planning pays off most. Pick one anchor color — deep purple, soft pink, or warm gold — and repeat it every few feet. Then fill between with supporting colors that sit near it on the color wheel. A border that repeats its colors feels calm and intentional. A border that changes color every three feet feels restless, however pretty each plant is.
Tip: leave a narrow path or a few stepping stones behind the back row if the border is deep. You will need to reach the climbers to tie them in and the tall plants to stake them, and trampling through the front row to get there ruins the planting.
7. Plant A Spring Bulb Bed That Returns Every Year

Spring bulbs are the best value in the whole garden. Plant them once in the fall, and they come back year after year, opening the season weeks before anything else dares to bloom. A bed planned around bulbs gives you color in March and April, when the rest of the garden is still waking up.
Plant in drifts, not in rows. Bulbs look best in generous, natural-looking groups — five, seven, or nine of one kind together, with the groups overlapping so the colors flow into each other. A single row of tulips along the edge looks like a guard of honor; a drift of tulips spilling into a drift of daffodils looks like a garden. Mix early, mid, and late bloomers — crocus and grape hyacinths first, then daffodils and tulips, then alliums — and the bed stays in flower for six to eight weeks instead of ten days.
Plant them at the right depth and let the foliage die back. The general rule is to plant a bulb two to three times as deep as it is tall, with the pointed end up, in soil that drains well. After flowering, leave the leaves alone until they yellow and flop. The leaves are feeding next year’s flower, and cutting them off early is the most common reason bulbs fade after a season or two. The University of Minnesota Extension’s guide to planting bulbs, tubers and rhizomes covers depth, spacing, and hardy versus tender bulbs in detail, and it is worth reading before you buy.
Tip: plant bulbs in the gaps of a perennial bed, not in a bed of their own. The perennials leaf out just as the bulb foliage dies back, hiding the mess and taking over the color for summer. One bed, two seasons, no bare patch.
8. Grow A Cottage Bed That Looks Full By Midsummer

A cottage bed is the most romantic style on this list: packed wall to wall with flowers in a happy, informal tangle, with no bare soil showing by midsummer. It suits older homes and picket fences, and it is the most forgiving style for a beginner, because the planting is meant to look abundant and a little wild.
Plant close and let them mingle. The cottage look comes from close spacing — plants set near enough that their leaves touch once they grow, so weeds have nowhere to start and the bed reads as one mass of bloom. Roses, foxgloves, delphiniums, and hollyhocks give the height at the back; lavender, salvia, and hardy geraniums fill the middle; pinks and creeping thyme spill over the front edge. Let a few self-seeders — foxgloves, calendula, or nigella — wander where they like, and pull out only the ones that land in the path.
Keep the colors soft and the structure simple. Cottage beds work best in pastels and gentle contrasts — pinks, lilacs, soft blues, and cream, threaded with silver foliage — rather than in hard, hot colors. The soft palette is what makes a packed bed feel calm instead of chaotic. One piece of simple structure holds it all together: a low wooden edging, a brick border, or a short picket fence along the front. Without that frame, a full bed can tip over into looking untended.
Tip: deadhead the roses and the spent foxgloves through summer, and the bed will keep throwing up new flowers until fall. A cottage bed rewards ten minutes with the secateurs once a week more than any other style does.
9. Build A Pollinator Bed That Hums All Summer
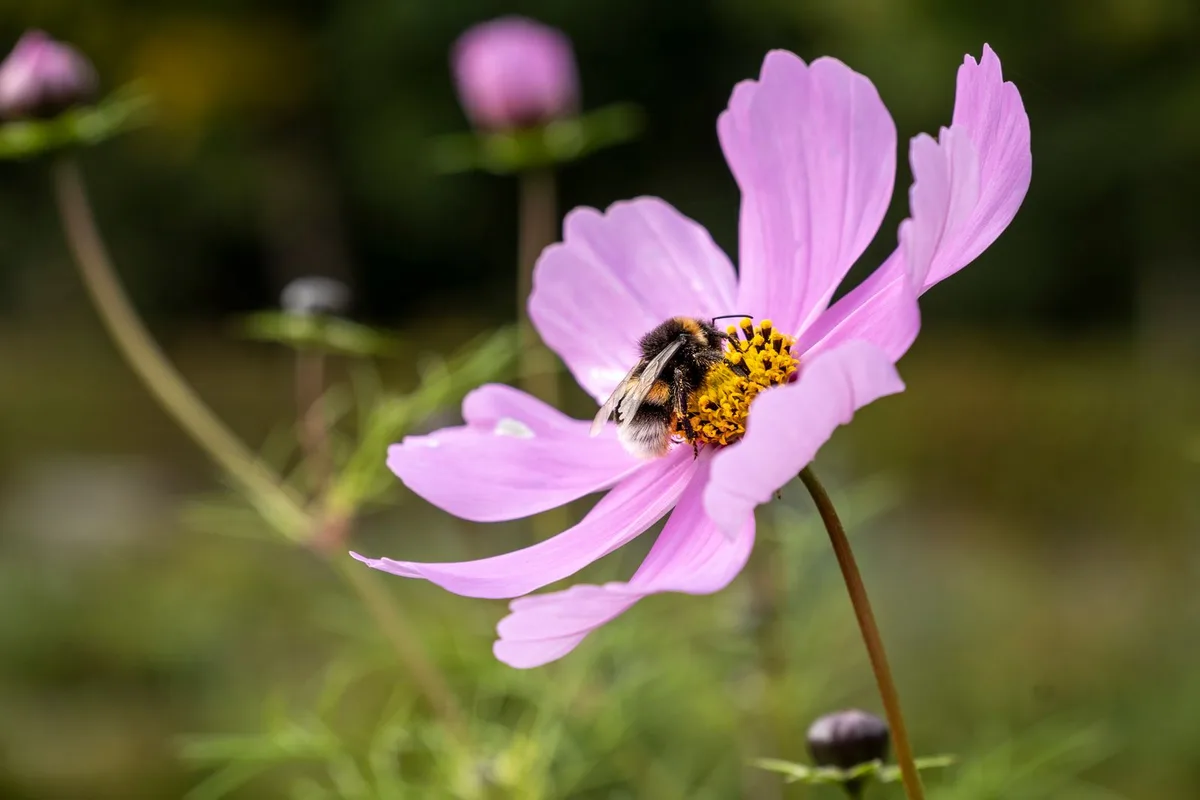
A pollinator bed is planted for the bees, butterflies, and hummingbirds as much as for the eye, and it repays you with movement and life all summer. The flowers are open and simple — the kind insects can actually feed from — and the bed is at its best when it is in full, slightly wild bloom.
Choose single flowers, not doubles. The showiest double flowers, with their dense ruffles of petals, often hide or replace the nectar and pollen that pollinators need. Single flowers — coneflowers, black-eyed Susan, salvia, lavender, bee balm, and milkweed — are the ones insects can work. Plant them in drifts of three to five so a foraging bee can visit a dozen flowers without flying far, and mix plants that bloom from early summer to fall so there is always something in flower.
Leave a little mess on purpose. A pollinator bed does not need to be tidy. A patch of bare soil gives ground-nesting bees somewhere to live, and leaving the seed heads standing through fall feeds birds and shelters insects until spring. Skip the insecticide entirely in this bed — it kills the very visitors you planted for. A shallow dish of water with a few stones in it, set at the edge of the bed, gives bees and butterflies a safe place to drink.
Tip: put the pollinator bed where you sit in the evening, not hidden at the back of the garden. The hum of bees and the flicker of butterflies are half the pleasure, and you will only notice them if the bed is where you actually spend time.
10. Plant A Hot-Color Bed For Late Summer

By late summer, many spring and early-summer beds are fading, and the garden can look tired just when you are using it most. A hot-color bed — reds, oranges, and golds, at full strength — peaks exactly then, and it carries the garden through August and September with energy to spare.
Give it the sunniest spot you have. Hot colors need full sun to read clearly; in shade they turn muddy and dull. Scarlet dahlias, fiery crocosmia, golden black-eyed Susan, helenium, and red or orange salvia all thrive in sun and build to a crescendo in late summer. Add a few dark-leaved plants — dark dahlias or purple-leaved cannas — to deepen the drama, and a touch of acid green or deep purple foliage to stop the heat from becoming overwhelming.
Deadhead relentlessly and stake the tall ones. A hot bed earns its keep by flowering for weeks, but only if the spent blooms are cut off before the plant sets seed and gives up. Walk the bed once a week with secateurs and take off anything finished. Tall dahlias need staking before they flop — put the stake in at planting time, while you can still see where the plant is, rather than trying to prop up a fallen stem in August.
Tip: one confident bed of hot color, balanced by calmer green planting around it, is a statement. Two or three is a shout.
11. Design A Shade Bed That Glows In Low Light

Shade is not the absence of a garden — it is a different garden, and a shade bed done well is the most elegant spot in the yard. The secret is to stop chasing bright flower color and start working with light: pale blooms, silver leaves, and bold foliage that catch what little light there is and seem to glow in it.
Lead with foliage, not flowers. In shade, leaves do the work. Hostas in greens, blues, and variegated patterns, ferns with their fine fronds, and heuchera with leaves in shades from lime to deep burgundy give the bed its shape and texture all season, whether or not anything is in flower. Then add the flowers that thrive in low light: white astilbe plumes, foxgloves, impatiens, and pale hydrangeas. White and pastel blooms read far better in shade than deep reds or purples, which simply disappear into the gloom.
Layer the textures. A shade bed needs contrast in leaf size and shape to avoid looking like a flat mass of green. Pair the big, bold leaves of hostas with the fine, feathery texture of ferns, and set a few upright plants — astilbe spikes or foxglove towers — against low, spreading ground cover. Mulch with dark bark, which makes the pale flowers and silver leaves stand out, and keep the bed watered in dry spells, since shade under trees and walls is often drier than it looks.
Tip: a shade bed is the one place where a little garden lighting earns its keep. A single soft light at the back of the bed turns the pale blooms and bold leaves into an evening feature, and it costs far less than lighting the whole garden.
12. Plan One Bed For Color From Spring To Fall

This is the bed the whole article has been building toward: one bed, planned so that something is always in flower from the first crocus of spring to the last aster of fall. It is not the biggest bed in the yard, and it is not the flashiest. It is the one you plan on paper before you plant, and it is the one that makes the garden feel alive for the longest stretch of the year.
Work in three waves. The spring wave is bulbs — crocus, daffodils, and tulips planted in fall, flowering from March into May. The summer wave is perennials and annuals — salvia, coneflowers, daylilies, and petunias — taking over as the bulb foliage dies back and carrying the bed through June, July, and August. The fall wave is asters, sedum, and ornamental grasses, which come into their own in September and October just as the summer flowers fade. Plant all three waves in the same bed, in the same layers, and the bed hands the color from one group to the next without a gap.
Keep a simple chart. Before you buy anything, write down what blooms when, in three columns — spring, summer, fall — and check that no column is empty. If July has six plants and September has none, move one or two late bloomers into the plan before you dig. A bed planned this way needs no more work than any other bed, but it repays the hour of planning with six months of color instead of six weeks.
Tip: leave one small patch of the bed empty on purpose, and fill it each year with something new — a different annual, a new variety you want to try. A bed that changes a little every year stays interesting, and the empty patch is your reminder that a garden is never finished.
Keep The Color Going After The First Flush
A flower bed is not a one-weekend project, but it is not a full-time job either. The beds that look best in September are the ones that got three small habits through the season: water deeply and less often, so roots grow down instead of staying at the surface; mulch in spring, so the soil holds moisture and the weeds stay down; and deadhead once a week, so the plants keep making flowers instead of seed. Ten minutes a week, a hose, and a pair of secateurs will carry a well-planned bed from the first crocus to the last aster. Start with one bed and get it right — then add a second next season.
Frequently Asked Questions
How Wide Should A Flower Bed Be?
A bed against a house or fence should be three to four feet deep, which is enough room for three layers of plants — tall at the back, medium in the middle, and low at the front. A bed narrower than two feet can only hold a single row, and it will always look thin. An island bed in the middle of a lawn should be at least five to six feet across, so the middle layer has room and the bed reads well from every side.
What Flowers Come Back Every Year In A Flower Bed?
Perennials come back from the same roots year after year, and the reliable ones for a flower bed include daylilies, coneflowers, black-eyed Susan, salvia, hostas, and ornamental grasses. Spring bulbs such as daffodils, tulips, and crocus also return, provided their leaves are left to die back naturally after flowering. Annuals such as petunias and marigolds flower for one long season and need replanting each spring, so a good bed mixes perennials for structure with annuals for extra color.
How Do I Keep A Flower Bed Blooming All Season?
Plant in three waves: spring bulbs for March to May, summer perennials and annuals for June to August, and late bloomers such as asters and sedum for September and October. Deadhead spent flowers once a week so plants keep producing new blooms instead of setting seed, and water deeply so the roots stay strong through hot weather. A bed with one plant for each part of the season stays in color far longer than a bed planted with a single flush of flowers.
How Much Sun Does A Flower Bed Need?
Most flowering plants need at least six hours of direct sun a day to bloom well, which is what gardeners call full sun. A spot with three to six hours of sun, or dappled light through a tree, suits part-shade plants such as astilbe, hostas, and impatiens. Before planting, watch the spot through a day and count the hours of direct sun — it is the single most useful measurement in the whole garden, and it decides which plants will thrive and which will struggle.
What Is The Easiest Flower Bed For A Beginner?
A low-maintenance perennial bed is the easiest place to start. Pick a sunny spot three to four feet deep, improve the soil with compost, and plant five or six kinds of hardy perennials — daylilies, coneflowers, black-eyed Susan, salvia, and catmint are all forgiving — in groups of three or five, with mulch on top. Perennials come back every year, need little more than watering in dry spells and a yearly tidy-up, and the bed gets fuller and better looking with each season.