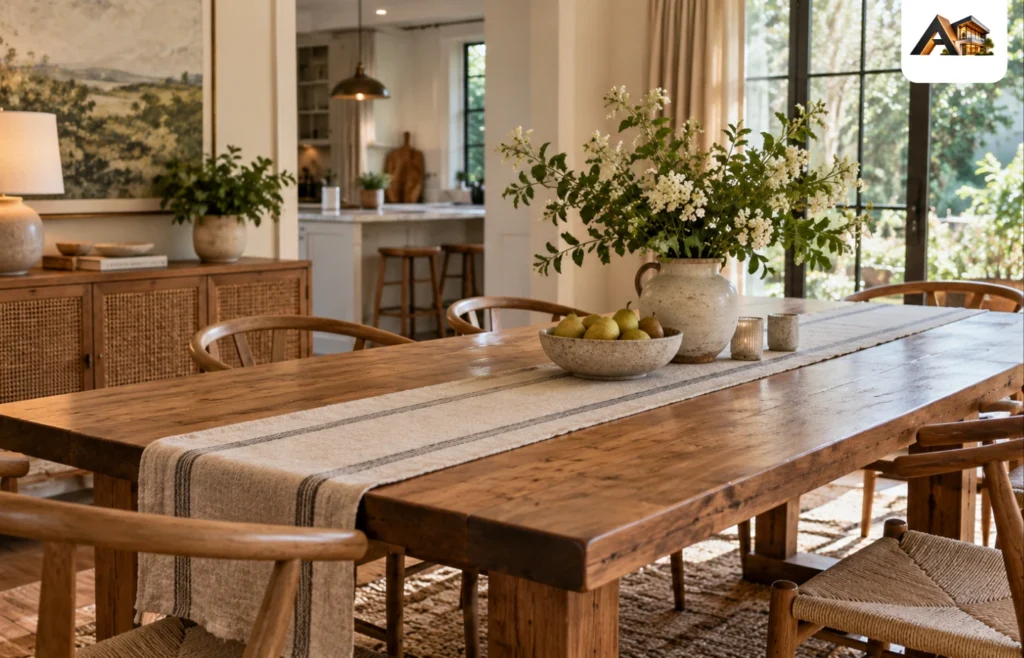

Crown molding is the decorative trim that runs along the top of a wall where it meets the ceiling, installed at an angle so it bridges the corner instead of sitting flat against either surface. It “crowns” the room the way a cornice crowns a building — finishing the joint between wall and ceiling, hiding the small gaps and uneven lines that every house has, and giving the eye a clean, intentional edge to follow around the room.
That is the whole definition, but it hides a surprising amount of choice. The profile you pick changes the character of a room. The material decides whether it survives a bathroom or warps in one. The size has to match your ceiling height or it looks wrong. And the cost swings from a modest weekend project to a whole-house job depending on which of those choices you make. This guide puts all of it in one place — definition, profiles, materials, sizing, costs, installation, and style matching — because no single source out there covers the full picture.
How Crown Molding Works?
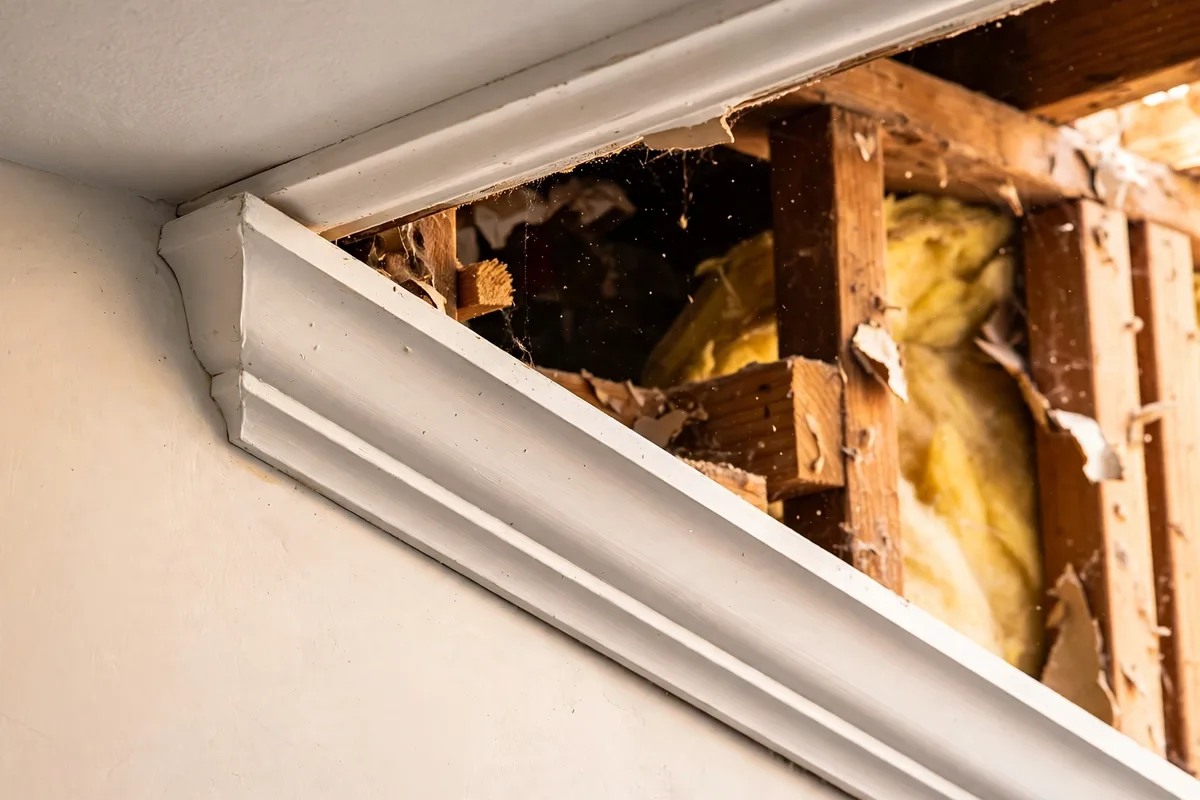
The trick to crown molding is the angle. Unlike baseboard, which sits flat against the wall, crown molding is cut with two flat edges — one that rests against the wall, one that rests against the ceiling — and the visible face sits diagonally between them. That leaves a hollow triangular space behind the molding, which is why it is sometimes called a cornice.
The spring angle. The angle between the molding and the wall is called the spring angle, and the two standard angles are 38 degrees and 45 degrees. A 45-degree spring angle means the molding meets the wall and ceiling at equal angles, which makes cutting simpler. A 38-degree spring angle leans the molding slightly more toward the ceiling, which gives a taller look on the wall. You do not need to memorize the numbers — but you do need to know which one your molding uses before you cut it, because the miter saw settings depend on it.
Why the gap-hiding matters. Walls and ceilings are almost never perfectly straight or perfectly square. In an older house they can be off by a visible amount. Crown molding hides that: because it bridges the corner at an angle, it covers the uneven joint where wall meets ceiling, and the eye reads a crisp straight line instead of a wavy one. That is the practical reason it exists, underneath all the decoration.
Crown molding vs cornice. The two words overlap. Strictly, a cornice is the whole built-up assembly at the top of a wall — sometimes several pieces of molding stacked together — while crown molding is the single angled piece. In everyday use, people say “crown molding” for both. If a contractor says “cornice,” they usually mean a larger, built-up version. If a design article says “crown,” it usually means the single piece. The difference matters only when you are ordering materials, so confirm which one your supplier means.
Crown Molding Profiles, Described Side By Side
A profile is the shape you see when you look at the molding end-on. It is the single biggest style decision in the whole project — the profile decides whether a room reads modern, traditional, or formal, and it decides how the light and shadow fall across the top of the wall. Here are the main profiles, described the way they actually look in a room.
Cove Crown Molding
The cove is the simplest profile: one smooth concave curve, like the inside of a bowl, sweeping from the wall up to the ceiling. It casts one soft, even shadow and reads calm and quiet. It is the best choice for modern and minimalist rooms, where the molding should finish the room without announcing itself. A cove in a 3- to 4-inch size suits an 8-foot ceiling well, and it is also the easiest profile to paint because there are no small details for paint to pool in.

Ogee Crown Molding
The ogee — also called cyma recta — is an S-curve: it flows outward in one direction and inward in the other, like a wave frozen in wood. It is the classic profile, the one most people picture when they hear “crown molding.” It casts a more interesting shadow than a cove, with a bright ridge and a dark hollow that give the ceiling line depth. Ogee suits traditional, transitional, and colonial rooms, and it is the safest default if you are unsure — it looks right in more homes than any other profile.

Dentil Crown Molding
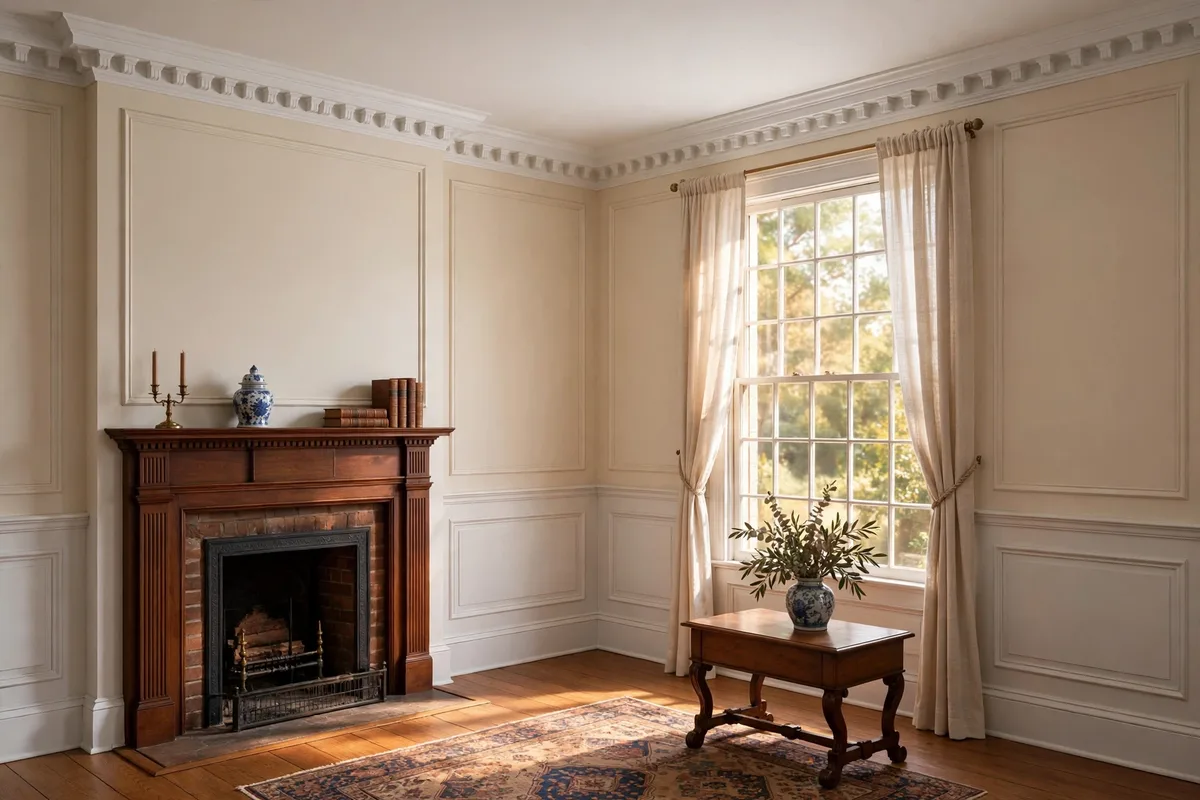
Dentil molding adds a row of small, evenly spaced rectangular blocks — like teeth — along the bottom edge of the profile. It is a formal, classical detail borrowed from Greek and Roman architecture, and it makes a room feel grand and deliberate. Dentil suits Georgian, Federal, and colonial-style homes, formal dining rooms, and entries. It is also the hardest profile to keep clean, because dust settles on every little block, and it is the most expensive to buy and install because the blocks are cut individually.
Egg And Dart Crown Molding
Egg-and-dart is the most ornate profile in common use: a repeating pattern of an oval “egg” shape alternating with a pointed “dart,” carved or molded in relief. It is a Victorian and classical detail that turns the ceiling line into a piece of decoration in its own right. It belongs in formal rooms with high ceilings — 9 feet or more — where its detail can be appreciated from below. In a small room with an 8-foot ceiling it overwhelms the space, and the pattern gets lost because you are standing too close to see it properly.

Stepped And Built Up Cornice Profiles
A stepped profile is made of flat bands stacked in steps, each one projecting a little further than the one below — a clean, architectural look that suits modern traditional and craftsman homes. A built-up cornice takes the idea further: several pieces of molding — a cove, a flat board, a dentil strip, a small ogee — stacked together into one large assembly that can reach 7 to 12 inches tall. Built-up cornices belong in grand rooms with 10-foot ceilings or higher, where a single small piece would look lost. They are also the way to get a large molding without buying one enormous, expensive piece.

Clamshell And Other Simple Profiles
The clamshell is a gentle convex curve — the opposite of a cove — that reads soft and informal. It suits bedrooms, bathrooms, and relaxed traditional rooms where a formal ogee would feel stiff. Beyond these, most suppliers carry dozens of variations, but they are almost all combinations of the shapes above: a curve, a step, a band, or a repeated ornament. Once you can recognize cove, ogee, dentil, and egg-and-dart, you can read any profile in a showroom.
| Profile | Look | Best Rooms | Formality |
|---|---|---|---|
| Cove | One smooth concave curve | Modern, minimalist, bedrooms | Low |
| Ogee | Flowing S-curve | Traditional, colonial, dining rooms | Medium to high |
| Dentil | Row of small blocks | Georgian, formal entries | High |
| Egg-and-dart | Carved egg and dart pattern | Victorian, formal rooms, 9 ft+ ceilings | Very high |
| Stepped | Stacked flat bands | Craftsman, modern traditional | Medium |
| Built-up cornice | Several pieces stacked | Grand rooms, 10 ft+ ceilings | Very high |
| Clamshell | Gentle convex curve | Bedrooms, bathrooms, relaxed rooms | Low |
Crown Molding Materials Compared
The material decides three things: what the molding costs, whether you can stain it or must paint it, and whether it survives humidity. Here is how the common options compare.
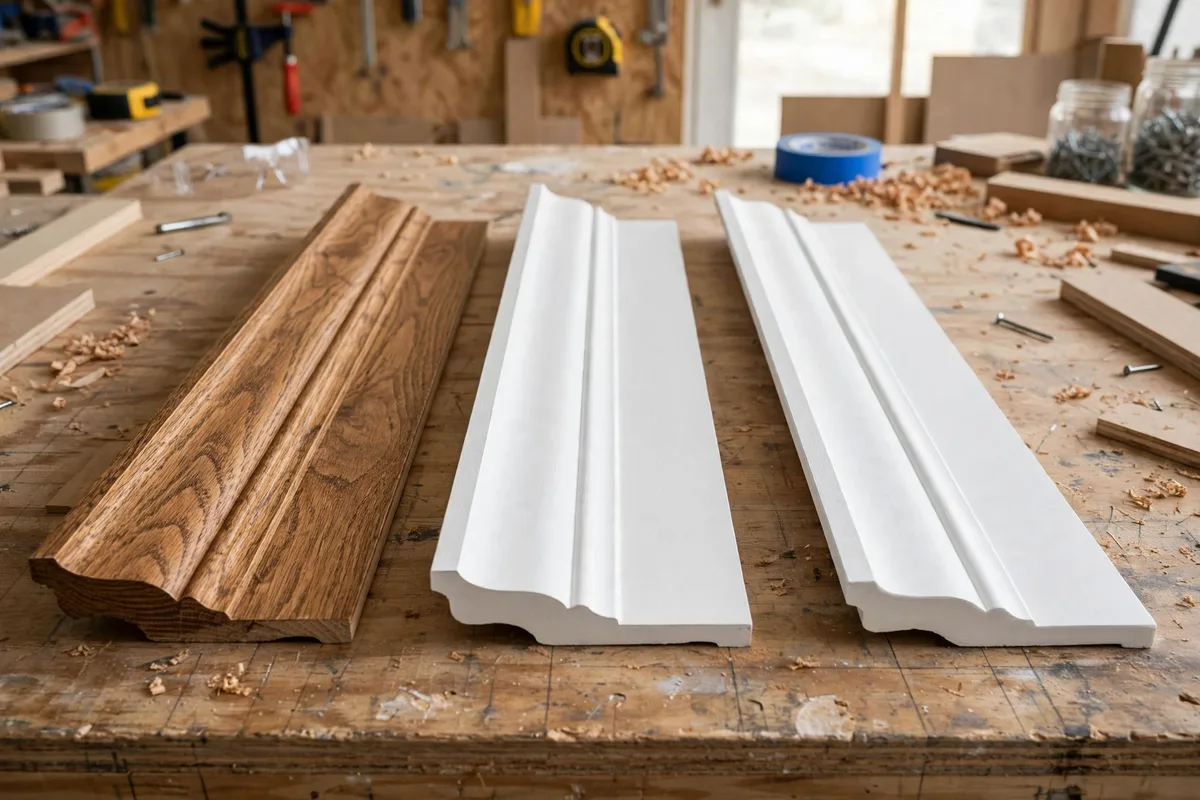
Wood. Real wood — pine, poplar, oak, maple — is the premium choice. It can be stained to show the grain, it takes paint beautifully, and it holds fine detail like dentil blocks and egg-and-dart carving. It is also the most expensive, the heaviest, and the only material that moves with the seasons: wood expands and contracts with humidity, which can open joints over time. Best for formal rooms and stained finishes. Material cost roughly $1 to $30 per linear foot depending on species and profile, with simple pine at the low end and hardwoods and carved profiles at the high end.
MDF (medium-density fiberboard). MDF is the budget workhorse: smooth, stable, cheap, and easy to paint. It does not warp like wood, and it comes in long lengths with clean, consistent profiles. Its weaknesses are moisture — it swells if it gets wet, so it does not belong in bathrooms or damp rooms — and weight, because it is denser than pine. It also dents more easily than wood. Best for painted molding in dry rooms on a budget. Material cost roughly $1 to $7 per linear foot.
Polyurethane and PVC. Polyurethane and PVC moldings are light, moisture-proof, and flexible enough to follow a slightly curved wall. They install with adhesive as well as nails, which makes them friendlier for DIY. Their weakness is that they dent and scratch more easily than wood, and they cannot be stained — paint only. Best for bathrooms, kitchens, and basements where moisture is a factor. Material cost roughly $2 to $10 per linear foot for polyurethane and $1 to $4 for PVC.
Plaster. Traditional plaster molding is the most authentic choice for historic homes, and it can be cast into very fine detail. It is also the heaviest, the most fragile, and the most expensive to install, because it usually needs a professional. Best for restoration work in period homes. Material cost roughly $6 to $30 per linear foot.
Polystyrene and foam. The cheapest option, under $1 to $4 per linear foot. Light and easy to cut, but soft, easily dented, and clearly less substantial up close. Best for a quick cosmetic upgrade in a low-traffic room, or for a renter-friendly project where perfection is not the goal.
| Material | Material Cost Per Foot | Paint Or Stain | Moisture | Best Use |
|---|---|---|---|---|
| Wood | $1–$30 | Both | Moves with humidity | Formal rooms, stained finishes |
| MDF | $1–$7 | Paint only | Swells when wet | Budget painted molding, dry rooms |
| Polyurethane | $2–$10 | Paint only | Waterproof | Bathrooms, kitchens, basements |
| PVC | $1–$4 | Paint only | Waterproof | Damp rooms, DIY adhesive install |
| Plaster | $6–$30 | Paint | Heavy, fragile | Historic restoration |
| Polystyrene/foam | Under $1–$4 | Paint only | Light, easily dented | Quick cosmetic upgrade |
What Size Crown Molding Should You Choose?
Size is the decision people get wrong most often, and the rule is simple: match the molding to the ceiling height, not to the room’s ambition.
- 8-foot ceilings: a 3- to 5-inch profile. This is the standard for most homes, and it is the size that looks right without crowding the wall.
- 9-foot ceilings: a 4- to 7-inch profile. The extra foot of height gives you room for a slightly larger molding or a simple two-piece built-up.
- 10-foot ceilings and higher: 7 inches and up, or a built-up cornice reaching 12 inches. A small molding on a tall wall looks lost, like a picture hung too high.
A useful rule of thumb from several guides is about 1 inch of molding height per foot of ceiling height — an 8-foot ceiling points to roughly a 3- to 4-inch molding, which matches the ranges above. But proportion is more than a formula: a long wall can carry a larger molding than a short one, and a room with tall baseboards and wide door casings can carry a larger crown than a room with slim trim. Before you buy, hold a sample piece up at ceiling height and look at it from across the room — a profile that looks generous in your hand can look thin from eight feet away, and that test is worth more than any chart.
Also remember that the listed width of a molding is not the same as how far it drops down the wall. Because crown sits at an angle, a 4-inch-wide piece might only drop about 3 inches down the wall. Check the actual projection, not just the width on the label.
How Much Does Crown Molding Cost?
This is where the sources disagree, and the disagreement is easy to resolve once you see what each number actually includes. Bob Vila lists material prices — wood at $1 to $30 per linear foot, MDF at $1 to $7, PVC and polyurethane at $2 to $4, polystyrene under $1, and plaster up to $30 — but those are materials only, with professional installation extra, and the page dates from 2021, so treat the figures as ranges rather than current quotes. Angi lists installed prices — $4 to $8 per linear foot, or $2,000 to $4,000 for 500 linear feet — which include both materials and labor for a standard profile. Both can be right at the same time: materials are the smaller number, installed is the larger one.
Worked examples by room size. The table below uses Angi’s installed range of $4 to $8 per linear foot for a standard painted profile, and MDF material-only costs of $1 to $7 per foot for the DIY column. All figures are approximate ranges, not quotes — your local labor rates and the profile you choose will move them.
| Room | Linear Feet | Installed ($4–$8/ft) | DIY Materials Only, MDF ($1–$7/ft) |
|---|---|---|---|
| Small bedroom, 10 × 12 ft | 44 ft | $176–$352 | $44–$308 |
| Living room, 12 × 14 ft | 52 ft | $208–$416 | $52–$364 |
| Large living room, 16 × 20 ft | 72 ft | $288–$576 | $72–$504 |
| Whole main floor | 500 ft | $2,000–$4,000 | $500–$3,500 |
What moves the price. The profile is the biggest lever: a simple cove in MDF is the cheapest job in the table, while a carved egg-and-dart in hardwood can cost several times more per foot. Painted molding costs less than stained, because stain-grade wood and the finishing work cost more. High ceilings add cost because the installer works from taller scaffolding. And old houses cost more, because out-of-square corners take longer to fit — which is the next section’s whole subject.
DIY vs professional. DIY saves the labor portion, which is roughly the difference between the two columns above, but it costs a weekend and a miter saw, and it demands the coping skill below. A professional brings the saw, the experience, and the speed — a single room in a day is normal for a pro. The honest split: if you are doing one room, the molding is a simple profile, and you are comfortable with a miter saw, DIY is a fair choice. If you are doing a whole floor, the profile is ornate, or the ceilings are high, hire it out. The fullest cost picture we found comes from Angi’s crown molding cost guide, which is the only source in our research that published installed totals rather than material prices alone.
One claim we are deliberately not repeating: a 50–80% return-on-investment figure for crown molding appears in one source with no evidence behind it. No study or data is cited for it, so we are leaving it out rather than passing an unverified number on to you.
How To Install Crown Molding Yourself?
Installing crown molding is a learnable DIY job, but it is not a beginner’s first project. The hard part is not the nailing — it is the corners. Here is the full sequence, step by step.
Tools you need. A miter saw that cuts compound angles, a coping saw, a tape measure, a stud finder, a nail gun or a hammer and finish nails, wood filler, caulk, and a ladder tall enough to work comfortably at the ceiling. A protractor or angle finder helps in older homes where corners are not square.
Step 1: Measure every wall. Measure each wall at ceiling height, and add about 10 percent extra for cuts and mistakes. Mark the studs along the top of the wall with light pencil marks so you know where to nail.
Step 2: Cut the first piece square. The first piece on a wall butts into the corner with a straight square cut. The second piece, the one that meets it in the corner, is where coping comes in.
Step 3: Cope the inside corners. This is the skill that makes or breaks the job. Cut the second piece with a 45-degree miter, then use the coping saw to cut away the wood behind the mitered face, following the profile line. What is left is a thin edge shaped exactly like the profile of the first piece, and it slides over the first piece’s face like a glove. A coped joint stays tight even when the wall is not square — which is why professionals cope inside corners instead of mitering them. Mitered inside corners open up as the wood moves; coped joints do not.
Step 4: Cut outside corners with a miter. Outside corners — where the wall turns outward — are mitered, not coped. Cut both pieces at 45 degrees so they meet in a point. Test-fit before you nail; if the corner is not a true 90 degrees, adjust the angle a degree or two at a time until the joint closes.
Step 5: Nail into studs and ceiling joists. Hold the molding at its spring angle, nail through the flat edges into the wall studs and the ceiling joists, and space nails about every 16 inches. Never nail only into drywall — the molding will pull away over time.
Step 6: Fill, caulk, and paint. Fill nail holes with wood filler, caulk the top edge where the molding meets the ceiling and the bottom edge where it meets the wall, and sand the filler smooth. Prime, then paint two coats. The caulk line is what makes the job look professional: it hides the tiny gap between molding and wall that no cut can fully close.
The corner-block shortcut. If coping sounds like more than you want to learn, corner blocks are the alternative: small decorative square blocks fitted into each corner, with the molding butting squarely into them. No angled cuts at all. It is a legitimate traditional detail, not a cheat, and it suits simpler profiles well.
When to call a professional. If the ceilings are over 9 feet, the profile is ornate or plaster, the house is old and no corner is square, or you are doing more than two or three rooms, a professional trim carpenter will finish faster and cleaner than a first-timer. There is no shame in that — coping is a learned hand skill, and a pro has done it a thousand times.

Matching Crown Molding To Your Home’s Style
The right profile is the one that agrees with the rest of the house. A home is a set of decisions that should talk to each other, and the crown molding is part of that conversation.
- Modern and minimalist: a simple cove or a slim stepped profile, painted the same white as the ceiling. Keep it small — 3 to 4 inches — and let it disappear.
- Traditional and colonial: an ogee or a dentil profile, sized to the ceiling height. Match it to the other trim in the house; if the baseboards are ogee, the crown should be too.
- Victorian: egg-and-dart or a built-up cornice, larger and more ornate. Victorian rooms were designed for this kind of detail, and restraint reads as unfinished.
- Farmhouse and craftsman: a stepped profile or a simple cove, often with a flat band above it. Keep the detail honest and the size modest.
- Mid-century modern: usually none at all, or a very slim cove. Mid-century design values clean lines and open corners, and crown molding can fight that.
Paint color decisions. The most common choice is to paint the crown the same color as the ceiling, usually white, which makes the ceiling feel higher and the molding read as part of the architecture. Painting it the wall color instead makes the walls feel taller. Matching the other trim in the room — baseboards, door casings, window trim — is the safe rule: if your baseboards are white, your crown should be white too. A contrasting color is a bold move that works only in rooms with strong, deliberate color schemes.
When NOT to use crown molding. Not every room wants it. Very low ceilings — under 8 feet — can feel lower with a large molding pressing down on them; a slim cove or nothing at all is better. Rooms with sloped or vaulted ceilings need special handling, because the molding has to follow an angle that changes along the wall, and a standard install looks wrong. Bathrooms need moisture-proof materials or no crown at all, because MDF swells and wood moves in steam. And if the rest of the house has no trim detail — slim baseboards, plain casings — a large ornate crown will look like it belongs to a different house. The design guides that think hardest about this point treat crown molding as a decision, not a requirement: if it does not agree with the room, leaving it out is the better design choice.

Cleaning And Upkeep
Crown molding collects dust on its top edge and in its profile curves, and because it sits above eye level, the dust is invisible until it is thick. Dust it every month or two with an extendable duster or a vacuum brush attachment. For painted molding, wipe it down once or twice a year with a damp cloth and mild soap. Check the caulk line where the molding meets the wall and ceiling each year — seasonal movement can open small cracks, and a fresh bead of paintable caulk closes them in minutes. In bathrooms and kitchens, watch for moisture damage on wood and MDF, and repaint promptly if the finish starts to fail.
Crown Molding And Your Ceiling
Crown molding is one of the few upgrades that touches both the walls and the ceiling, so it pays to think about the ceiling as part of the same decision. The size of the molding, the height of the room, and the lighting all work together — a large molding can hide a strip of LED lighting behind it for a soft wash of light across the ceiling, a trick called cove lighting that turns the molding into a light fixture. For more on what your ceiling can do, our guide to bedroom ceiling ideas covers lighting, beams, and ceiling treatments that pair with crown molding. And for the wider picture of how trim, color, and proportion work together in a room, see our interior decorating ideas and ideas for designing a living room.
Frequently Asked Questions
Is Crown Molding Outdated?
No. Simple profiles like cove and ogee are still standard in new traditional and transitional homes, and they appear in most high-end listings. What looks dated is an oversized ornate profile in a room that does not suit it, or yellowed molding that has not been repainted. The molding itself is not the problem — the mismatch is.
Can You Install Crown Molding Yourself?
Yes, if you are comfortable with a miter saw and willing to learn coping. A single room with a simple profile is a fair weekend project. Ornate profiles, plaster, high ceilings, and whole-house jobs are better left to a professional trim carpenter.
What Is The Difference Between Crown Molding And Cornice?
Crown molding is the single angled piece of trim at the wall-ceiling joint. A cornice is the larger built-up assembly, sometimes several pieces stacked together. In everyday use the words are often swapped, but when ordering materials, confirm which one your supplier means.
Can Crown Molding Go In A Bathroom?
Yes, but only in moisture-proof materials like polyurethane or PVC. MDF swells in steam, and wood moves with humidity. Paint it with a moisture-resistant paint, and make sure the room has working ventilation.
How Do You Clean Crown Molding?
Dust it monthly with an extendable duster or a vacuum brush attachment, and wipe painted molding with a damp cloth and mild soap once or twice a year. Re-caulk the edges when seasonal movement opens small cracks.
The Short Version
Crown molding is a single angled piece of trim that finishes the joint between wall and ceiling, hides the gaps every house has, and sets the character of the room. Choose the profile by the style of your home — cove for modern, ogee for traditional, dentil or egg-and-dart for formal rooms — match the size to your ceiling height, pick a material that survives the room it goes in, and decide honestly whether the corners are a job you want to learn or a job you want to hire. Get those four decisions right and the molding looks like it was always part of the house.